Showing posts with label Mistyfuse. Show all posts

Sunday, September 21, 2025

No. 16

No. 16
50.5" x 40"


This one is another quilt addressing the issue of privacy. Literally, this quilt is about windows, specifically, the extensive use of floor to ceiling glass windows in many new modern houses. If you can see out, then others can see in. I love the idea of being able to see out, and bringing nature into a building (which was the original intent of this style of architecture). But I also really value my privacy. This would not be an ideal house for me. Also, because guns, when I see a house like this, all I can think of is, where do you hide from the bullets? I will leave you to imagine the metaphorical meaning of this work, because it is not obvious. (HINT: Think of the word 'windows' and privacy, and you'll be there!). 

I have been dreaming of this one for a long time, like YEARS, but I couldn't see the whole picture. I wanted fish swimming in a house of floor to ceiling glass windows. Then about 9 months ago, I found a commercially printed paper with koi fish. I KNEW that these would be the fish for the quilt. Except that, they were paper, and I wasn't sure how this was going to work??

I got the courage to go ahead and try moving forward on the project by trying to sketch the house. None of my efforts were working. I drove around Austin looking for the perfect 'model' house to sketch. I did not find it, though I suspect it is out there somewhere. Then I decided to look online for some ideas. I found these 3. 

None were perfect, or had the right angles, so I just jumped in and tried making a perspective drawing of a house in my sketchbook. I have never done a perspective drawing before, though I had seen one on social media. I was surprised how easily it all came together. Then I had to upscale the drawings for each room to make a pattern. 
Here is the sketch of the kitchen:

After sketching, I had to decide how to cut this apart and make it into a pattern, and which pieces would be sewn together first? I wanted to minimize the Y seams because those are more challenging. I used colored pencils to outline the shapes that would be sewn together as a group. Then I cut the sketch apart...labeled the pieces, and selected the fabrics for each piece.
This part feels a little daunting. However, a friend reminded me that I have done projects with more pieces, and that helped!

The next step is to trace each piece onto the back of the fabric and then cut them out with a seam allowance. And, it is a little challenging because some of the pieces are small and hard to hold still while tracing around them onto the fabric. One by one, they are stitched together. It would probably have been easier to paper piece this and definitely more accurate, but I find this method to be mentally easier.
After getting the house pieced, and the background, it was time to consider the fish. So, I cut them out and freed them from their backgrounds.
I wasn't sure how many I would need, so I just keep cutting and placing them on the design wall. Ultimately, I decided that this was too many fish!

You can see from this photo that the fish are swimming in FRONT of the house. However, I wanted them placed IN the house, which means they would need to be swimming behind some of the house walls. So, I cut open the seam allowances in the house, where the fish would be, and inserted them in through the new slots. Then I hand stitched the seams to match the size needed for the fish opening. I also needed the fish to stay in place before I got to the quilting part, so I used Mistyfuse on the back side of the fish. Did you know it works great on paper too? Cool! Note: This was a sequence error. It is easier to put Mistyfuse on the fish before cutting them out than afterwards, so trimming the Mistyfuse to the fish body was a bit tedious.

If you look closely, you can see the fish behind the just barely transparent fabric of the door!

Then I started the machine quilting. I was very concerned that the needle holes from the quilting would rip the paper the fish were on. Fortunately it was such a heavy weight of paper that I had no problems! Whew! I did have a very clear vision of how I wanted the quilting lines to look, and it required a lot of stops and starts, which in turn meant a lot of thread tucking.

The other minor parts of the project included some hand applique for the lights in the kitchen, and a bit of satin stitch to define some of the shapes better. This put me on hold for a couple of weeks because I thought I needed some shiny black thread. I did get the thread, but the delivery was SO slow, and my patience for finishing the project was wearing thin. And then the new thread did not perform well in my sample testing, and I ended up using something I already had (which I can not remember now what it was...). That is the way it goes sometimes!
The last little part was the scariest! The fish took a bit of a beating with all the machine quilting from pushing the quilt through the machine so much. I decided to 'fortify' them with a couple of coats of high gloss medium, applied by hand with a small paint brush. I thought about doing it first, but the fish were ironed in place with the Mistyfuse, and I didn't want to try to iron a fish that had medium on the surface. So maybe it all worked out okay? 

I am overall very happy with the way this turned out! It is so satisfying to see an idea become actualized! I entered this quilt into Quilts=Art=Quilts, but it did not get accepted. As happy as it would have been to have my little quilt go out into the world, I am comforted when they get rejected because then I get to look at them a bit longer, and I don't have a lot of shipping expenses. Possibly a warped perspective here, but I am okay with that. I hope you like this one! Thanks for stopping by! 

Sunday, November 03, 2024

Garden Girl by the Sea

Garden Girl by the Sea
36" x 36"

I wanted to make a quilt that celebrates the extensive gardening I have been doing. I have also been missing the ocean.  I grew up by the ocean but rarely want to drive far to visit again. Many times I have wished for an ocean front property with a lovely house, but the geologist in me does not really want that. I understand about barrier islands and hurricanes. So, I will put it here in my art, and dream of it instead. Then I remembered that I already had a quilt like that. One that I didn't like anymore, and didn't need anymore, and was stored deep in my closet. So, I pulled it out.

To transform it into my new vision, I had to remove a number of the old elements, which included glued on string, some embellishments, and some applique. The dense satin stitching was not too hard to remove, but it left damage in the fabric. The glue was harder to remove, and very visible. I tried scraping it off, freezing it, and then trying to scrap it off, and a razor (which sadly made little holes in the fabric). So, I gave up for a while.

Then I saw a video about glue basting, and how it washes out! Why didn't I think of that???  So I tried getting the glue wet, and it was so easy to remove! I guess I got lucky with that one, because without it, the project could not proceed forward. I also remembered that if you get fusible applique hot again (at least for mistyfuse), you can peel it off. It worked perfectly after I removed the machine quilting first.

On to the rebuilding, and redesign!

I wanted to add a whale to the ocean part. I love the idea of living close enough to the ocean that I could see a whale. Fortunately, I had just made a quilt with screen printing, and I still had the screen for the whale. It took all of 10 minutes to print one whale AND clean up!  
Then I dyed it, and it was ready for fusible and to add to the quilt. 
I really love how the dye powder looks sprinkled onto the wet surface.  I wish it could have stayed that way after processing.

I also wanted to add a few flowers to cover a previously blank section in the lower right corner. I opted for some pink flowers, and cut the flower centers from an old piece of batiked fabric I made years ago.


I added a garden hose, and then used some hand quilting and hand embroidery with embroidery floss to make the water coming out of it.
The old version of the quilt had a pretty frustrated, possibly angry face. So I changed it to optimism and awe for the re-do.
And the last change was a pair of kittens by the little house. Very sweet!
Now I have it hanging on my wall. I have no plans to send it anywhere. It does provide a lot of joy when I look at it though!

Sunday, September 08, 2024

Where the Walls Have Eyes, Part 14

Where the Walls Have Eyes, Part 14
21" x 21" x 21"

Sometimes, when I get to a certain stage of making a quilt, the work speeds up for me, in eager anticipation of the finish. This was not one of those kind of projects. I had to deliberately work slowly so as not to tax my hands.

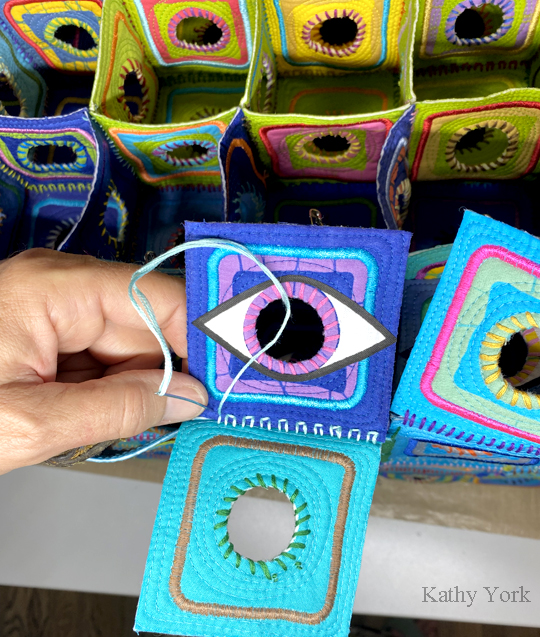
And then there were the unintentional delays.  The six stranded floss, at the point where it goes through the eye of the needle, becomes 12 strands. It is hard to push through the little quilted blocks, and much harder when there are also fused eyes to contend with.  Sometimes I would just yank it and accidentally peal off the fused eye. Rats!  I tried using a tiny miniature iron, I think it is called a Clove iron?, but I would over focus on the eye and the quilt, and not pay attention to where my fingers were, resulting in numerous clumsy burns. 
So, I opted for fabric glue, and clothespins and waited for the glue to dry. 
I also found that certain parts of the project were hard to reach at times.  The more I added, the taller it got. At one point, I had to switch from my table to a (closer to the floor) coffee table.  But then THAT was too low. 
My favorite seams were on the sides of the cube, because there are only 2 quilt pieces to join.  Very easy!
Here's what that stitch looks like from the inside.  You can also see me burying the thread end after taking 2 very tiny stitches in the end.  

Here is a sample below of sewing 3 pieces in one seam.  In this view you can only see 2 of the pieces.  The third piece is underneath, out of sight, until you flip this around.
Here's what it looks like to sew a seam with 4 little quilts in one seam. URGHH!
Just for a little trivia, I did not use any knots in the hand sewing seams.  I made a couple of very tiny stitches on the inside and then just proceeded forward.

I only used 2 hand stitching needles for the entire project.  This is the first one, after it broke.
Here is a photo of the inside at the part where it was time to use the little lime green squares! Ah YEASS!
And, here is the part where I got to add the little yellow squares.  Predictable, you can probably guess where this single yellow cube is.  Which is good, because once the cube is completely sewn, it is too dark to look inside to find it.
It is getting taller and heavier now. A view from inside the studio.   Ironically, the quilt on the wall is called Windows...
About half way through, I started arranging the 'ceiling' layers on my design wall.  It made it easier to keep up with the internal color patterning inside the cube. 
I never got tired looking through the holes to see the view. 

Getting very close to finishing.  This is the very last and top layer to add! Never thought I would see the day!!
The final project. I am not sure this view entirely captures how wonderful this is to experience in real life. So, I hope the process photos have help expand your imagination. The colors in real life are also pretty vibrant! 
As for the meaning behind this project, I have hidden some little trinkets inside the cube that are attached in a way that you cannot see them by looking through the holes.  I tried very hard unsuccessfully, and I KNEW where they were.  You could upgrade your "looking abilities" by investing in some technology, like a snake camera (which I did), and be able to see the hidden trinkets. It is possible to find them this way. And, it serves as a perfect metaphor for hackers upping THEIR game to steal YOUR privacy. 

Ta da! It really worked.  All those layers and it held up and did not collapse! 

And, for inquiring minds.  This build has 73.5 square feet of surface area.  That is equivalent to 102 in x 102 in quilt. And, all of these little pieces are essentially two-sided, so imagine twice the surface area!!
Compared to the flat version of the project (you can see here), it is even larger than THAT!

Sunday, July 28, 2024

Where the Walls Have Eyes, Part 11

Where the Walls Have Eyes, Part 11

I was looking for a way to more literally and visually show the loss of privacy when I remembered this expression.  So I decided to put eyes on the insides of the walls, and ceilings, and floors of the project.

How?

I tried a few things, but this is the one that stuck! (ha ha!)

Mistyfuse (to the rescue again!) on the back of white fabric.  Draw the eyeball with a pencil.  Outline it with the black posca paint pen. Yes, it can leak through the fabric, so I put a magazine under it.
And then cut them out with scissors.
I did not have perfect cutting technique, so after the center circles were cut out, I touched up any of the black edges with the black posca pen.  I used this magazine cover to keep from getting paint on my table.  It used to be a frog...sorry, frog!

There were never enough eyes....

Here's a few of them with the centers cut out, one on a white table background, and one on a green fabric background. 
                                                 
I had fun arranging these shapes into patterns before I used them for my project!

Time to add them to the little quilted squares. All it takes is an iron and a few teflon goddess sheets (so they won't stick to the ironing board cover should there be a slip up). 

I love how the irises of the eyes lines up with the holes in the blocks! Also, these are the fronts of some of the blocks that need eyes, but there were also many times when the backs of the little quilts needed eyes.  

This gets more interesting as I begin to build the blocks into their cubes and you look inside, through the holes, to see eyes there!!!

Next week, the problem with the holes and the eyes, and how I almost didn't build this thing! Stay tuned!


Wednesday, October 26, 2022

Currents Part 1
about 80" x 80"

The idea started as a self portrait.  I was thinking that quilting runs through my veins, which is at least a little bit true because my grandmother was a quilter.  I started sketching lines with my copic markers.  
After I made this first sketch, I wanted to put circles in between the lines, like little cells flowing through.  The fabrics could be some of my favorite print fabrics that I have collected over the years.  I decided to make a mock up on paper to see how it would look. I used Mistyfuse to press the circles in place and copic markers for the blue lines. Yes! Mistyfuse sticks to paper!

However, sometimes the fabric choices for the circle shapes disappeared into the white background.  So, I added the black dashed lines for handstitching.  It was okay, but my lines didn't look much like veins because they weren't branching out like a real vein.  And, that bothered me. Briefly.  I liked the linear aspects of the line drawing and it was only much later that I realized those lines are more about where I live.  They look like the hill country here in Austin, hills that were carved out by the Colorado River, the aerial view of the river also resembling these lines. I still wasn't convinced that I wanted to do the circles, which lead to the next and final idea.
This was also a bit of a stretch for my piecing skills.  I didn't know how to insert all these little pieces into the center white strip and still keep the big giant curve in it's original shape for the pattern.  Just because it looks simple, didn't mean that it was.  But, it was simple enough to see that it could be done. I would just have to learn how to do it.  And that learning part, well, that really appealed to me. 

If you are following me on Facebook or Instagram, you may have seen my project to reveal the year long project into 18 days. I will also share those same photos here in a later post. 

Wednesday, September 07, 2022

Charmed Remix

Charmed Remix
80" x 80"
It is hard to believe that it has been 3 months since I have posted anything.  I have been hard at work, but with other home improvement projects.  Meanwhile, this little quilt had been bothering me. (See previous post.) I had 'finished' it, but I didn't really like it that much, and it felt unfinished.  And it was blocking my creativity. Something needed to be done.  Then I had a flash of an idea that I thought might work, so I did a mock up on Photoshop, and I LOVED it.  Which just meant that now I had to DO it.  I knew it would be a lot of work, and if you are interested, I will show you what I did below!

First step was removing the old facing on the top and bottom of the quilt.  Easy!
Next, I drew the cutting lines across the surface of the quilt in a permanent marker.  Then I stay-stitched very close to the black lines before cutting the quilt apart with my scissors.
After all the pieces were cut, I rearranged the order of the quilted pieces, and looked at it for a while.  It definitely looked a LOT better in the new arrangement. So, I began by stitching the first two pieces together with a zigzag stitch, meanwhile wishing that my zigzag stitch was wider, but it is not. 

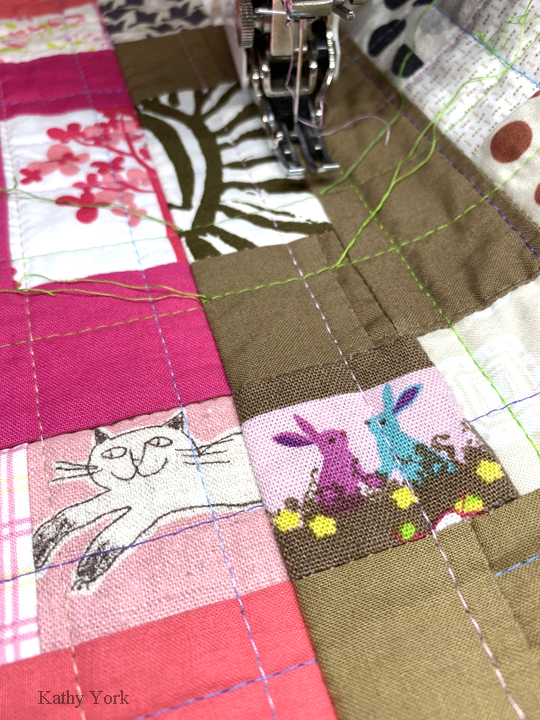
The reason this looks so complicated on the photo is because there are actually two passes with the zigzag, one from the front, and the other from the back.  And, they also neatly line up with the stay-stitching I did before cutting the quilt apart. On the back side, I used Mistyfuse on fabric strips first pressed right on top of the seam, and then I put the zigzag stitch on top of that.
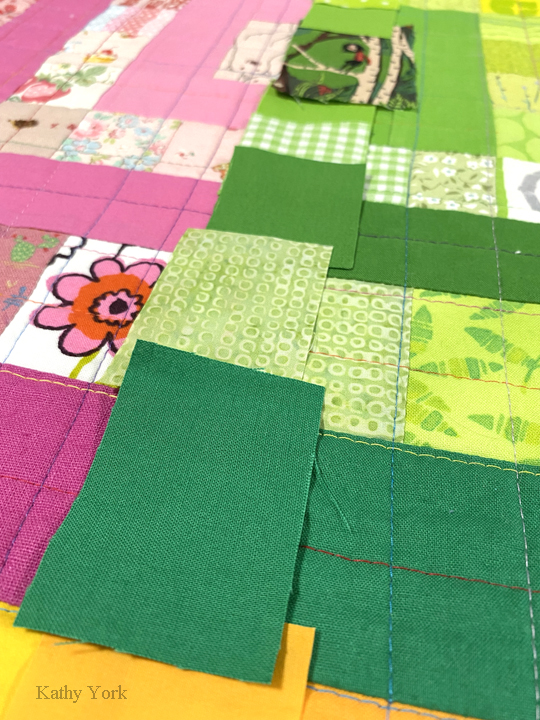
I have a lot of experience with this type of quilt construction because we used to do this all the time when we made our group art quilts. However, because this was a really large quilt, and intended to be used, (not just hung on a wall), I wanted the front side to be prettier, and I also wanted those seams to be stronger.  So, I pulled out my original stash and began the hunt for matching fabrics to cover that seam. 
After finding them all, I cut them to size.
Then I chain pieced them together in a long strip.
Pinned right sides together on the quilt and then stitched the cover strip on.
I intentionally made the original cut 1/4" off center, so that when I added this cover strip, the seam would be exactly center of the block once it was stitched on and pressed to one side.
Then I turned under 1/4" on the raw side, and pinned it down with tiny applique pins, and handstitched in place.

Then I repeated all these steps on the other 3 seams.

To complete the illusion and also strengthen the seam even more, I decided to extend the existing quilting lines on top of the cover strip.  It was about this time I was starting to question using so many different colored thread choices. I think I used about 45 different colors.  Nuts!
There were some vertical lines, but most of the new quilting lines were horizontal, spaced approximately 1" apart on 4 different seams.  It made for a lot of thread ends to tuck in.  I didn't think I would ever finish, even though I was so close to the end!
The illusion is complete! Here is a closeup detail of one of the seams.
In the end, it was a huge amount of work.  But ultimately it was worth it.  I really like the quilt now, and I didn't before.  Also, since finishing this one, I have moved on to quilting another one that has been languishing on the shelf.  More about that one later! 

This work not only cured my creative slump, but it also gave more meaning to me and it feels more authentic.  A lot of the fabrics used in this quilt are children fabrics. I love them!! It not only reminds me of the fun I had as a kid, but also the joy I had parenting my children when they were young.  The cut apart blocks remind me of when my marriage broke apart. A broken home represented here by a cut apart log cabin block. Once again I am in awe of the process of quilting and how it connects deeply with a part of my life. In this case, with lots of effort and attention to detail, the quilt was reformed in a beautiful fashion. I like to think the same thing of coparenting and raising our kids, that with lots of effort, attention to detail, and hope, it can be done beautifully. 

Last if you are wondering how bright this quilt really is? Here is a photo of it in front of my house on an overcast day.