Showing posts with label hanging tube. Show all posts

Wednesday, December 15, 2021

Ocean Blues/Oil and Water - other cool stuff about this quilt

Ocean Blues/Oil and Water - other cool stuff about this quilt
74" x 74"

The quilting:
I usually pin baste my quilts, on the floor. Mostly because my quilts are big, and I don't have a table big enough for really big quilts. The floor is a pretty uncomfortable place to work, but it gets good results.  This time, I did pin baste my quilt. However, I also have had problems with machine quilting the further I get from the center. It is as if the backing fabric travels, regardless of having been pinned in place. My hand basted quilts do not do this. So, I opted to switch out the pin basting for hand basting on this quilt. I am not convinced that I need to do both, but there it is.
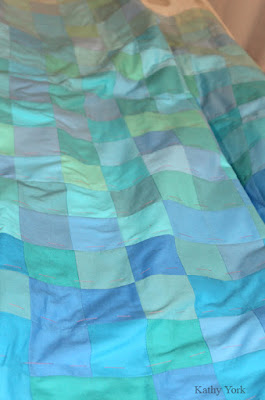
ready for quilting!!

I also wanted my quilting threads to kind of disappear into the back ground, but also provide a linear aspect to the quilting design.  I opted for these wonderful very thin polyester threads from Superior Threads. 
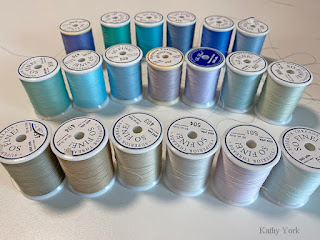
It was another expense to buy a whole new line of threads, but I was super happy with the visual effect after I quilted this.  As a bonus, one that I did not anticipate, because the threads were NOT cotton, they did not fill up my machine with lint.  I did not have to clean the lint with every bobbin change, which was awesome!!
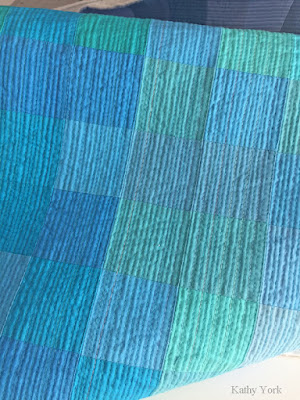
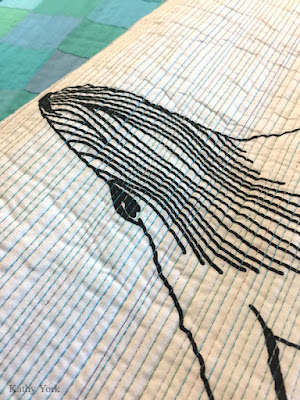
I love the side lighting coming through the window for this shot!

A whale and all the quilting lines.

I had a very hard time dragging this quilt through my sewing machine. Usually a big quilt is already hard because it is bulky and heavy. This one was harder. Apparently the black fabric paint on the other side was creating more friction with my table. I decided to try using painter's tape to attach some Goddess sheets (teflon sheets) from Mistyfuse to reduce the drag. It worked great and made my job SO MUCH EASIER. Thanks Iris!!
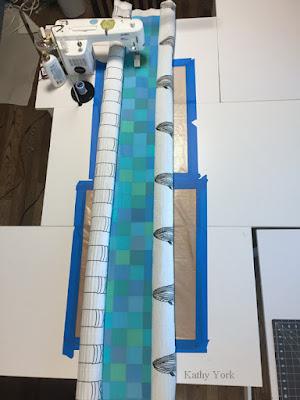
A top view looking down on my quilt under my sewing machine

The hanging sleeve, hanging tube:
Before I quilted the top 5" or so, I had an idea, one that I have used before on a two-sided quilt. I decided to peel back the layers, and insert more fabric and batting to make an internal hanging sleeve.  It worked great! And the construction of it was seamless and I got to incorporate the quilting and the tube at the same time, which is very hard to explain, but it worked!
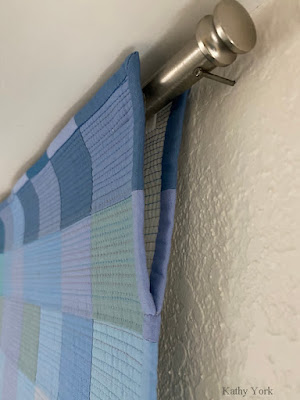
It is undetectable from either side! Here is a top view. It also works for a larger sized hanging rod, but this is the one I am currently using while it is hanging at my home.
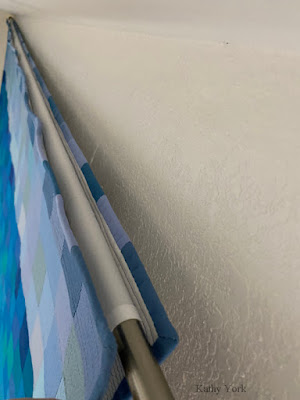
The binding:
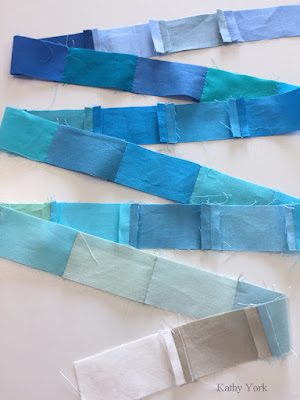
You may have already noticed that the binding changes colors with every block. I did not pre-plan this. I was indecisive about the binding for the entire construction of the quilt. It was only when I got to the end, that I decided my absolute best choice was to do it this way. So I dug out all the fabrics I used and started cutting new pieces to make the "blended" binding. So many pieces! ARGH!!
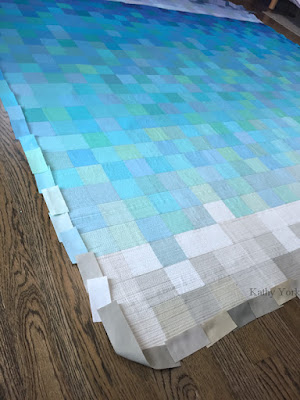
Then I stitched all the little pieces together. I opted to do only one side at a time to deal with the corners. I also opted for open seams to reduce bulk when turning the binding to the other side of the quilt.

I am happy with the way it turned out. It also looks really good from both sides of the quilt.


There is ONE MORE THING! But this post is already long, so I am saving it for next week. Hope you will pop back by. It is the coolest thing ever!! Cheers!

Wednesday, June 16, 2021

Caterpillars/Butterflies

Caterpillars/Butterflies
64" x 62"

Whoot hoo!  Finally finished with this one! 
Caterpillar side:

Butterfly side:

This quilt for me is all about the similarities and differences between the four panels.  They each have things in common with each other, but also differences.  And, from my previous post... I love the way the tops of the butterfly panels flow together in a continuous arc.  It is a metaphor for the differences in individuals and yet they all belong to the same family or community. It is a feeling of belonging, like a safety net, or a protective arc, like an umbrella, helping us weather the storm.

You may notice that the white fabric on the back looks a bit less than white? Each panel has a slight color cast because there are so very many threads of different colors used for the quilting.

Quilting:
Even though I pin basted the quilt, I wanted absolutely no shifting between the layers.  I started in the middle and worked my way out by removing the pins, and replacing with hand basting every 2 inches or so.  Then I filled in with some machine quilting.  Then I went back in for the close spaced machine quilted lines.

You can see the front (the green and orange), with the rolled up section of the back (the blue butterfly).

The caterpillar side of the blue panel with all the quilting lines going through the tiny pieced "humps".

The same section of the quilt from the butterfly side showing the quilting lines and thread colors
. 
Quilt Textures:
You may remember from the previous post, my concerns about doing this matchstick densely spaced quilting over all the tiny pieces sections with lots of seam bulk? Well, I opted to put in the carefully trimmed batting.  In some sections, I even put in the extra batting just to add another element of texture design.  It is kind of cool how the circles show up on the other side, just from the extra individual circles of batting that are inside the quilt, and how they allude to the design on the opposite side of the quilt.

This side is the caterpillar side.  I inserted a circle of batting under the white circle.

This is the butterfly side of the same panel.  Can you see the evidence of the extra circle shaped batting?
It is a subtle effect but really quite interesting!

Two-sided binding:
The very top photos show the quilt photographed on a grey back board.  If you look closely, you can see that the binding does not distract from the design.  I pieced it to match the different colored sections, and I made it two-sided.  That way, it could be white on one side of the quilt, and black on the other.  This required a "knife-edge" binding, which was not at all easy.


Also, on the butterfly side of the quilt, I tried to match the black binding to the section of the wings that were going off the edge of the quilt.  I made a design decision to just use a solid black, even though there were more colors on the edge. 

Hanging tube:
The quilt was so heavily quilted, that a simple white tube (the same color as the background fabric), would have stuck out and not blended in. I made the painstaking decision to top stitch the tube with all the same colors.  Yeah, I did that!

One color at a time, I went down the tube and traced where it should go. This is the mostly empty sleeve on top of the back of the quilt.
Nearly there, I am almost finished with this blue section and ready to move on to the warmer section on the right.
Here is the tube sewn with a tuck and pinned to the back.
The photo of the butterfly side of the quilt at the top has the hanging sleeve already sewn on it.  Can't see it? Yep, that was the point!  Success!!!

Wednesday, December 16, 2020

Bloom: Part II

Bloom: Part II
71" x 71" (the other side of Seeds)

Here is the full view!! So pretty!
And a close up:

Where we left off after the previous post:

Since I knew my design was going to be a bit asymmetrical, I knew that I needed some organization of the design pieces, especially as it got bigger.  So, I pinned the right side of the front side of the quilt (Seeds) to the design wall (wrong side out), and placed the pieces of Bloom on top of it, where they would actually be centered.  The center of Bloom was designed to be right on top of the blue seed from Seeds.
I can't tell you how many times I thought about making this a one sided quilt, with the 'seeds' as the background for this big bloom.  It is definitely compelling! Anyway, by designing it on the go like this, I was able to plan better as I got closer to the edges of the quilt. Here are some photos near completion, where you can see the grid quilting from the front side (Seeds).
This one is the entire back after it has been trimmed and is ready for binding. 
After the I completed the quilting from the front, and bound the quilt, it was time to start the hand quilting from the back. I opted for a double line of heavy 12 wt. thread, Sew Sassy.  It was perfect and Superior Threads had enough colors to mimic the gradient of my fabrics!  I also wanted the quilting to look the same on the front as it did on the back.  This is really NOT easy.  The only way minimize the space between stitches and have the stitches look similar on the front and the back is with 'stab and jab'. The needle needs to go in at a 90 degree angle (not obvious from this picture, sorry!) This is a very slow process, on an already longer than expected project.  Just when I thought I had gotten close to the finish line, it moved further back! Ultimately it looked good, and was just what I wanted.

  
And, lastly, it just worked out this way, but I was ready, if necessary to take those blue arcs right up and into the hanging tube.  I got lucky this time!  Just a simple and plain white hanging tube was all it needed. Yeah for the little things!

Wednesday, April 01, 2020

Turn the Dial - Stealth Hanging Tube

Turn the Dial - Stealth Hanging Tube
detail of the back side of Turn the Dial with the matching hanging tube
To hang a quilt for an exhibit, or quilt show, or even on the wall at home, it needs to have a fabric sleeve or hanging tube sewn securely to the back.  For two-sided quilts, I like to make the hanging tube look like it is part of the design of the back side of the quilt.  For some quilts, this is super easy, especially if the top of the quilt is one piece of solid fabric all the way across.  For my yellow quilt, this was not the case.

note: This post is not meant to be a exact tutorial, but just a few tips to help you along the way if you ever desire to do something quite as crazy as this.  My experiences have taught me that just when I think that I have learned how to do this on an easier piece, I make a new mistake on the next one, and have to start over.  It has definitely been a learning curve for me.

My first idea was to get the paper template pattern out and use the top 8 or so inches of it to make a matching tube.  Sadly, this would not work because I inserted those random strips of color which changed the real sizes of my little arc pieces.  So, I needed a new template, one that matched the actual quilt.  Here's what I came up with:

I cut and ironed a long piece of freezer paper directly to the top of my quilt.


You can see the fabric through the paper.  So I took a pencil and traced the shapes underneath.  And, I started finding all the fabrics I used in this section of the quilt.  It is a crazy amount of different fabrics!

After tracing the shapes, I peeled the freezer paper up and then labeled the pieces and started cutting them apart.

Once I had the individual pieces cut, I ironed them to the front side of the corresponding fabrics.  Remember to cut a 1/4" seam allowance around each piece.


I think it gets a bit more complicated because the hanging tube is not sewn in a flat shape to the quilt back, it has a tuck in it so that it bellows out a bit.  This gives room for the rod to be inserted in the hanging tube and not distort the front of the quilt. The first tip is to try to match the bottom edge of your tube to the place where it will be sewn onto the quilt.  Here's a photo of all the pieces sewn together like a quilt top and placed on top of the actual quilt to check for placement and if it matches or not.
Success!

Also, when I pieced this section, I did not make it wide enough for the entire tube.  So, I cut another long white piece for the back of the tube and sewed along one of the long edges (right sides together) to make it wide enough.  Then finish the ends by turning under 1/4", twice and topstitching.  Then sew the remaining two long sides of the tube and turn it inside out.  Use a basting stitch to make a pleat for that extra ease on the front side of the tube.  Then it was ready to sew to my quilt.  After hand stitching in place, the basting stitches are removed.

As a little extra touch, I added my label to the inside of the tube before hand sewing the tube on the quilt.  This way, when you look at the back side of the quilt, the label is not visible and it adds to the illusion of "which side is the front?"

I love it!