
74" x 74"
The quilting:
I usually pin baste my quilts, on the floor. Mostly because my quilts are big, and I don't have a table big enough for really big quilts. The floor is a pretty uncomfortable place to work, but it gets good results. This time, I did pin baste my quilt. However, I also have had problems with machine quilting the further I get from the center. It is as if the backing fabric travels, regardless of having been pinned in place. My hand basted quilts do not do this. So, I opted to switch out the pin basting for hand basting on this quilt. I am not convinced that I need to do both, but there it is.
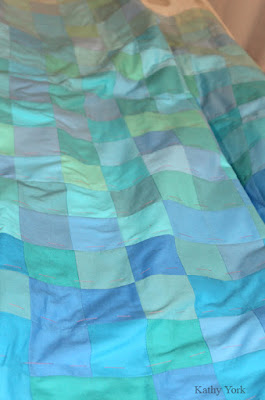 |
| ready for quilting!! |
I also wanted my quilting threads to kind of disappear into the back ground, but also provide a linear aspect to the quilting design. I opted for these wonderful very thin polyester threads from Superior Threads.
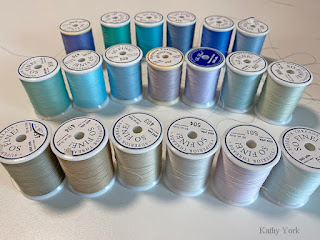
It was another expense to buy a whole new line of threads, but I was super happy with the visual effect after I quilted this. As a bonus, one that I did not anticipate, because the threads were NOT cotton, they did not fill up my machine with lint. I did not have to clean the lint with every bobbin change, which was awesome!!
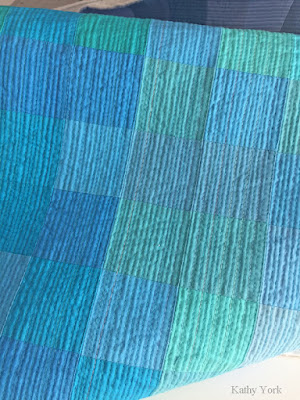 |
| I love the side lighting coming through the window for this shot! |
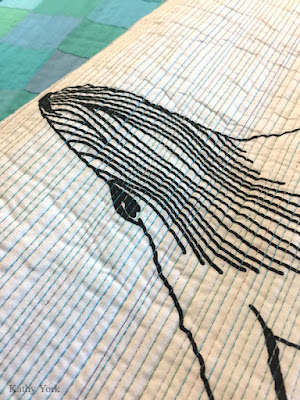 |
| A whale and all the quilting lines. |
I had a very hard time dragging this quilt through my sewing machine. Usually a big quilt is already hard because it is bulky and heavy. This one was harder. Apparently the black fabric paint on the other side was creating more friction with my table. I decided to try using painter's tape to attach some Goddess sheets (teflon sheets) from Mistyfuse to reduce the drag. It worked great and made my job SO MUCH EASIER. Thanks Iris!!
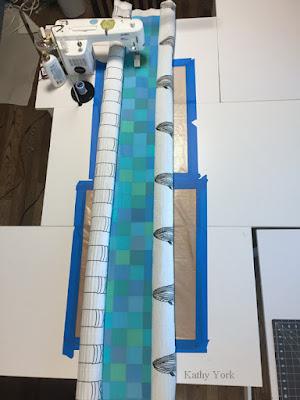 |
| A top view looking down on my quilt under my sewing machine |
The hanging sleeve, hanging tube:
Before I quilted the top 5" or so, I had an idea, one that I have used before on a two-sided quilt. I decided to peel back the layers, and insert more fabric and batting to make an internal hanging sleeve. It worked great! And the construction of it was seamless and I got to incorporate the quilting and the tube at the same time, which is very hard to explain, but it worked!
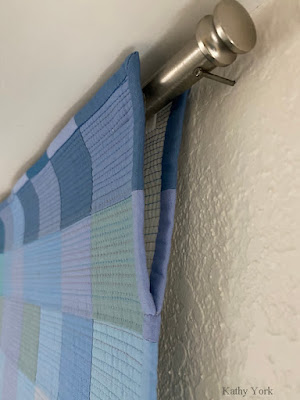
It is undetectable from either side! Here is a top view. It also works for a larger sized hanging rod, but this is the one I am currently using while it is hanging at my home.
The binding:
You may have already noticed that the binding changes colors with every block. I did not pre-plan this. I was indecisive about the binding for the entire construction of the quilt. It was only when I got to the end, that I decided my absolute best choice was to do it this way. So I dug out all the fabrics I used and started cutting new pieces to make the "blended" binding. So many pieces! ARGH!!
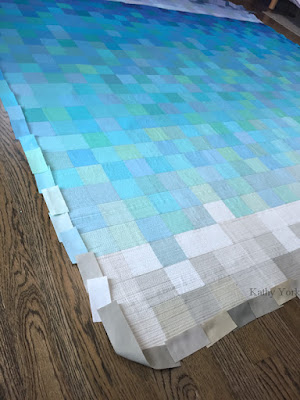

I am happy with the way it turned out. It also looks really good from both sides of the quilt.


There is ONE MORE THING! But this post is already long, so I am saving it for next week. Hope you will pop back by. It is the coolest thing ever!! Cheers!
4 comments:
I love the two sided hanging solution and now need to try it myself. Is the binding bulky where the two parts come together?
Karen,
In a short word, YES. It is a bit bulky where the parts come together, and awkward to get in there to sew it together. It works better if you do not overlap the binding, but rather use a butt joint.
Thanks for the share. Love to see more on the construction of the double binding. Fantastic!
Wen, it is just like a normal binding, just cover all the raw edges of the quilt. You could experiment with different ways of covering it at the "Y" seam, and find what works for you. It is tricky to get that part to look good, but it can be done.
Post a Comment