Showing posts with label binding. Show all posts

Sunday, August 10, 2025

No. 11 Part 3

No. 11
78.5" x 53.5"

Part 3
Taking a negative and turning it into a positive. This was made from the outtakes of No. 9, and has been turned into the central theme of No. 11. Working on this project was so very helpful. I firmly believe that art heals. Gardening also heals and helps manage my depression and anxiety. So when it is too early in the season to work in the garden, this project was a perfect distraction!

Note, while this quilt does not technically have any half square triangles, it was the next in this new series of work. And it was made from parts from a quilt that does have a lot of half square triangles. It feels like it belongs, and so I am keeping it here.

After the background was quilted, I appliqued the flowers and stems by hand, and then I needed to quilt the flowers. I used a cutout freezer paper template (pressed into place), to help design the quilting lines for the flowers. The 1/4" masking tape is a bit difficult to turn such tight curves smoothly, but it gets easier as the curves get bigger. 


Ready to free motion quilt now! (and then repeat the process for the other 3 flowers!).
To finish the edges, I saved the very last color at the ends of the gradients for the binding. My binding was going to be 1/4", so it blends seamlessly with the color strips. 

I also opted to extend the flowers into the binding. I don't know why, it just looked right to me.
Last is the hanging tube, label on the back, and photographing the completed work. We took it up to the top of Mount Bonnell for a "quilts in the wild" photo! I didn't realize it was so windy that day, which made it a big challenging! For your viewing pleasure!


Wednesday, December 15, 2021

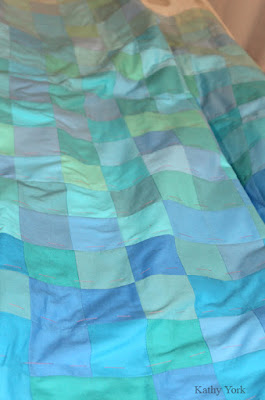
Ocean Blues/Oil and Water - other cool stuff about this quilt

Ocean Blues/Oil and Water - other cool stuff about this quilt
74" x 74"

The quilting:
I usually pin baste my quilts, on the floor. Mostly because my quilts are big, and I don't have a table big enough for really big quilts. The floor is a pretty uncomfortable place to work, but it gets good results.  This time, I did pin baste my quilt. However, I also have had problems with machine quilting the further I get from the center. It is as if the backing fabric travels, regardless of having been pinned in place. My hand basted quilts do not do this. So, I opted to switch out the pin basting for hand basting on this quilt. I am not convinced that I need to do both, but there it is.
ready for quilting!!

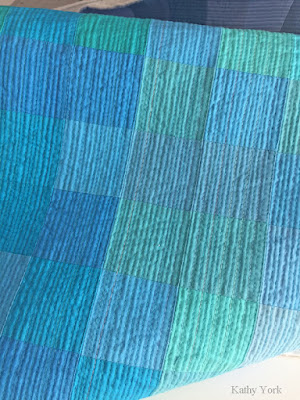
I also wanted my quilting threads to kind of disappear into the back ground, but also provide a linear aspect to the quilting design.  I opted for these wonderful very thin polyester threads from Superior Threads. 
It was another expense to buy a whole new line of threads, but I was super happy with the visual effect after I quilted this.  As a bonus, one that I did not anticipate, because the threads were NOT cotton, they did not fill up my machine with lint.  I did not have to clean the lint with every bobbin change, which was awesome!!

I love the side lighting coming through the window for this shot!

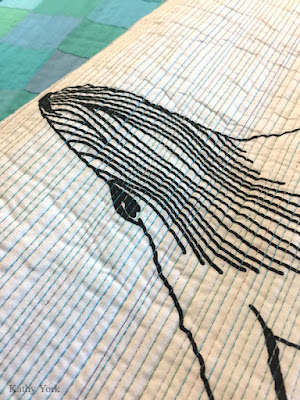
A whale and all the quilting lines.

I had a very hard time dragging this quilt through my sewing machine. Usually a big quilt is already hard because it is bulky and heavy. This one was harder. Apparently the black fabric paint on the other side was creating more friction with my table. I decided to try using painter's tape to attach some Goddess sheets (teflon sheets) from Mistyfuse to reduce the drag. It worked great and made my job SO MUCH EASIER. Thanks Iris!!
A top view looking down on my quilt under my sewing machine

The hanging sleeve, hanging tube:
Before I quilted the top 5" or so, I had an idea, one that I have used before on a two-sided quilt. I decided to peel back the layers, and insert more fabric and batting to make an internal hanging sleeve.  It worked great! And the construction of it was seamless and I got to incorporate the quilting and the tube at the same time, which is very hard to explain, but it worked!

It is undetectable from either side! Here is a top view. It also works for a larger sized hanging rod, but this is the one I am currently using while it is hanging at my home.

The binding:
You may have already noticed that the binding changes colors with every block. I did not pre-plan this. I was indecisive about the binding for the entire construction of the quilt. It was only when I got to the end, that I decided my absolute best choice was to do it this way. So I dug out all the fabrics I used and started cutting new pieces to make the "blended" binding. So many pieces! ARGH!!
Then I stitched all the little pieces together. I opted to do only one side at a time to deal with the corners. I also opted for open seams to reduce bulk when turning the binding to the other side of the quilt.

I am happy with the way it turned out. It also looks really good from both sides of the quilt.


There is ONE MORE THING! But this post is already long, so I am saving it for next week. Hope you will pop back by. It is the coolest thing ever!! Cheers!