Showing posts with label stash busters. Show all posts

Wednesday, September 07, 2022

Charmed Remix

Charmed Remix
80" x 80"
It is hard to believe that it has been 3 months since I have posted anything.  I have been hard at work, but with other home improvement projects.  Meanwhile, this little quilt had been bothering me. (See previous post.) I had 'finished' it, but I didn't really like it that much, and it felt unfinished.  And it was blocking my creativity. Something needed to be done.  Then I had a flash of an idea that I thought might work, so I did a mock up on Photoshop, and I LOVED it.  Which just meant that now I had to DO it.  I knew it would be a lot of work, and if you are interested, I will show you what I did below!

First step was removing the old facing on the top and bottom of the quilt.  Easy!
Next, I drew the cutting lines across the surface of the quilt in a permanent marker.  Then I stay-stitched very close to the black lines before cutting the quilt apart with my scissors.
After all the pieces were cut, I rearranged the order of the quilted pieces, and looked at it for a while.  It definitely looked a LOT better in the new arrangement. So, I began by stitching the first two pieces together with a zigzag stitch, meanwhile wishing that my zigzag stitch was wider, but it is not. 

The reason this looks so complicated on the photo is because there are actually two passes with the zigzag, one from the front, and the other from the back.  And, they also neatly line up with the stay-stitching I did before cutting the quilt apart. On the back side, I used Mistyfuse on fabric strips first pressed right on top of the seam, and then I put the zigzag stitch on top of that.
I have a lot of experience with this type of quilt construction because we used to do this all the time when we made our group art quilts. However, because this was a really large quilt, and intended to be used, (not just hung on a wall), I wanted the front side to be prettier, and I also wanted those seams to be stronger.  So, I pulled out my original stash and began the hunt for matching fabrics to cover that seam. 
After finding them all, I cut them to size.
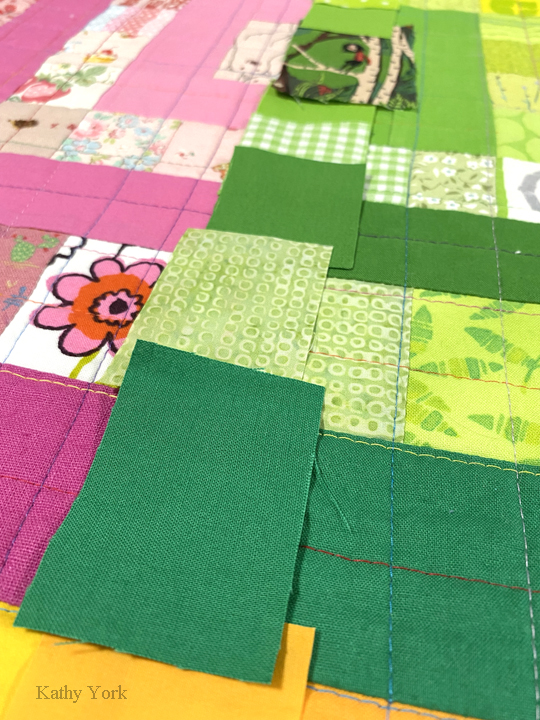
Then I chain pieced them together in a long strip.
Pinned right sides together on the quilt and then stitched the cover strip on.
I intentionally made the original cut 1/4" off center, so that when I added this cover strip, the seam would be exactly center of the block once it was stitched on and pressed to one side.
Then I turned under 1/4" on the raw side, and pinned it down with tiny applique pins, and handstitched in place.

Then I repeated all these steps on the other 3 seams.

To complete the illusion and also strengthen the seam even more, I decided to extend the existing quilting lines on top of the cover strip.  It was about this time I was starting to question using so many different colored thread choices. I think I used about 45 different colors.  Nuts!
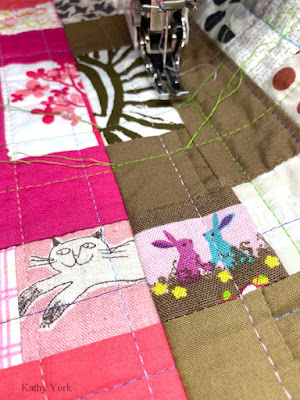
There were some vertical lines, but most of the new quilting lines were horizontal, spaced approximately 1" apart on 4 different seams.  It made for a lot of thread ends to tuck in.  I didn't think I would ever finish, even though I was so close to the end!
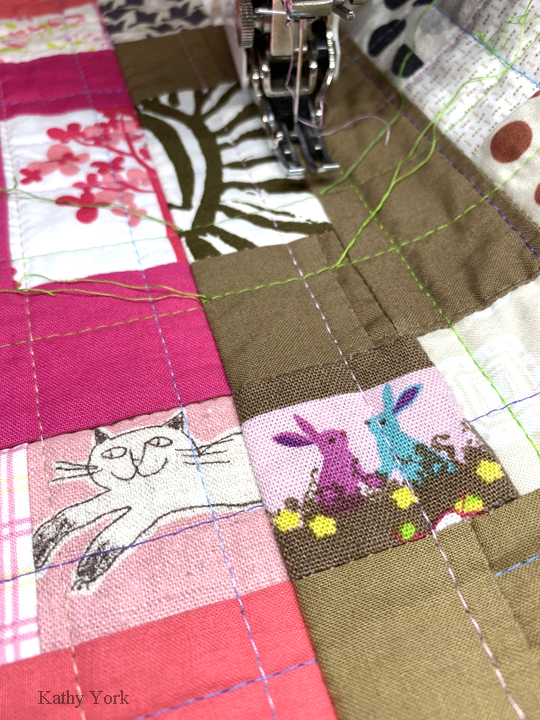
The illusion is complete! Here is a closeup detail of one of the seams.
In the end, it was a huge amount of work.  But ultimately it was worth it.  I really like the quilt now, and I didn't before.  Also, since finishing this one, I have moved on to quilting another one that has been languishing on the shelf.  More about that one later! 

This work not only cured my creative slump, but it also gave more meaning to me and it feels more authentic.  A lot of the fabrics used in this quilt are children fabrics. I love them!! It not only reminds me of the fun I had as a kid, but also the joy I had parenting my children when they were young.  The cut apart blocks remind me of when my marriage broke apart. A broken home represented here by a cut apart log cabin block. Once again I am in awe of the process of quilting and how it connects deeply with a part of my life. In this case, with lots of effort and attention to detail, the quilt was reformed in a beautiful fashion. I like to think the same thing of coparenting and raising our kids, that with lots of effort, attention to detail, and hope, it can be done beautifully. 

Last if you are wondering how bright this quilt really is? Here is a photo of it in front of my house on an overcast day.


Friday, May 27, 2022

Charmed

Charmed
79" x 79"

This quilt is sadly one of those that I don't really like that much after it is finished.  I began it with such wild enthusiasm, and then it didn't have the overall visual appeal that I thought it would.  A great lesson for me, one that I am apparently still learning.  But, I believe it is probably a shared experience.  And it is disappointing to spend so much time with it, and then not like it in the end.  

Regardless of my feelings for the overall look of it, I LOVE the closeups of the little fabrics.  And it has hundreds and hundreds of different fabrics! You can see more of these in previous posts from last fall (part 1, part 2, part 3).  It is a quilt that I LIKE getting close to.  And, there are some things I like about the design. For example, I love how the alternating light and dark solid fabrics make the blocks kind of twinkle and move your eye around.  It kind of reminds me of a stack of Starburst candy. 

It is also the first one in a long time that is NOT two-sided.  I found a suitable fabric for the back, and am happy with it.  I also chose to face this quilt and flip the facing to the back.  Each square has a different color attached, and one that is different than the front.  It makes me happy!

Here it is from the front side, folded, with the back and the facings showing a little bit! 

And, apart from my disappointment, it is so lovely to finally have another finish! I have been struggling with repetitive use injuries from obsessive quilting.  My solution is to work on multiple projects that are in different stages. I can work briefly on tasks that utilize different parts of my body.  It is difficult to work this way.  I find that I like completing a project before moving on to the next one.  I had racked up 4 different quilt tops doing this, and then had 4 quilts to quilt, which sort of defies the purpose!  This one is finished.  On to the next... 

Wednesday, October 27, 2021

Complements - project

Complements 
project about 80" x 80"

from the outside railing of my house...at least the colors look right in the natural lighting. 
(Please excuse the weights on the top holding it in place.)

It started like this. I was actually nervous about cutting such giant pieces of solid fabrics.  I also was in short supply of a few colors like pink, and turquoise.  So I went ahead and cut with fabrics I already had and decided it looked better with the slightly different colors (though you may disagree).  And, then I decided to mix it up a bit more with a few of the other colors, the red, and yellow, and lime green....
LOVE it!!


Then I worked one color at a time to build up blocks of pieced strips to fill in between the solid stripes.

I love the scrappy look of all these different prints!! The cutting was not the fun part, so many fabrics to pull, cut, and then re-fold.  Sometimes I like to fussy cut, so that I can showcase something interesting in one of the prints even if the scale is small.
Or this one with the cat and birds!
And the hummingbird! So sweet!

I sewed the narrow strips in groups of 10 to make a block.  Each strip is generally cut only 1" wide, though there were a few exceptions! 

More shots of all the pieces!  There were A LOT of pieces!!
Then I sewed the blocks together, and finally sewed the long lines of blocks to the solid pieces.  Easy and fun!

A last shot of a 'behind the scenes' photography shot, I hung the quilt top on my deck railing for the first photo.  When I went back upstairs to take it down, I saw how beautiful it looked through the rails!


Wednesday, September 29, 2021

Charmed, part 2

Charmed, part 2
project 80" x 80"


Here are 4 blocks! The whole quilt top will have 16 blocks. And, I am currently in the process of replacing one of the blocks that I did not think played well with the others.  A photo of the entire quilt top will be coming soon!  Meanwhile, I like the way the alternating values of the quilt add movement and kind of make it sparkle.  The bright colors make me think of the fruit flavored chewy candy known as Starbursts. 

From the perspective of the whole quilt on a computer screen, you can not see all the lovely details of the fabrics this quilt is celebrating.  So I will include some closeups of the individual blocks, and the some of the fabrics. A few more:


And some closeups of the cute fabrics!
Love these cute tulips and the hedgehogs!

The lovely pink llama fabric!

Great little owl!
Capybaras!!

I love this bold graphic!
And, there is always room for some Yaks!!

Pop up polar bear! He looks so friendly, as if he is saying "hello there!"

Climbing trees!

Wednesday, September 15, 2021

Charmed - project

Charmed
project 80" x 80"

This one started as a challenge to myself.  It is named after a charm pack swap I purchased from Bunny's Designs, and I was wondering what to do with the unusual assortment of little 5" squares of very interesting fabrics!

I decided to try some monochromatic blocks and I was drawn to my comfort zone, the log cabin block.  I decided to alternate rows of solid colors with rows of prints to build my blocks.  Each block would be BIG, 20" square.  To select the solid colors, I opted for a gradient.  Here are a few combinations that are auditioning for a spot.

After cutting the strips the right sizes, which I am embarrassed to tell you that I did wrong on a number of occasions, I started selecting which prints to use.

I have been collecting fabric for many years and I have a lot to choose from.  Ultimately, the ones that worked were the ones that had a bit of value difference compared to the solids that surrounded them. 
Here is a close up of the pink block:

I selected squares for the center from larger scale prints.  I LOVE these polar bears!!
It was also fun to include some of my own batiked fabrics in the mix.  These lovely oranges (and one red), helped extend the possibilities for the orange block.  I tried not to use any fabric twice, but in the end, I did, at least a few times. 

It was really fun to revisit my old fabrics and mix them with the new ones.  It brought up so many memories, it was like looking at a scrapbook.  Next week, I will show you more of the fabrics I used and some of the completed blocks!  And, I will likely want to put something interesting on the other side!  At least this kind of sewing has been a really fun way to stay busy while I wait for my sewing machine (that I use for quilting) to be repaired.  

Wednesday, December 04, 2019

Flow

Flow
70.5" x 86.5"

This design reminds me of liquid motion bubble tumblers. A snapshot in time, it is a great reminder to take time to breathe, slow down, and relax and be in the present. When I post next week, about the back side of this two-sided quilt, I will explain more.


It began as a great opportunity to use up some of my fabric stash.  I love aqua blue so much, that I had a lot of it!  The funniest thing was that as I started using up this collection of blues, I went out and bought some more, which kind of defeated the purpose of using up my stash.  I haven't done this for any of the other stash busting quilts I've made, just this one.  I guess I just need aqua fabric!

Some of these are pretty cute (like the cat faces!!)!  The little house fabric I got while making a commissioned quilt for STOF fabrics.


Here is a shot of the planning part, even though this was mostly random and improvisational, I did not want the vertical seams to fall in the path of the zigzag.


As I would get to each big section where the path would bend (approximately 1/3 of the quilt), I would slice the blue part and insert the section of white. The rotary rulers were so helpful by being marked with 60 and 30 degree angles!
I also had a few difficulties with the geometry along the way.  However, I found that if I thought about it, I could devise an experiment to test my idea before cutting the actual quilt.  The small experiments worked to either show me what I got wrong and try again, or validate what was right.

I thought I would cut the red circles with a circle cutter. I found it easier to cut lots of circles from freezer paper with the circle cutter, and then pressed them to the back of my red fabric and cut the seam allowance with scissors. I then pressed under the edges of the circles using the edge of the paper as a guide.  It made that part so easy!  Then I hand appliqued them to the quilt.


They don't look as flat as I would have liked, but the quilting I have planned will take care of that!
Here's a closeup of the quilting for the red drops. These were done using free motion machine quilting.


I also used a walking foot for the aqua blue part this project.  The lines are quilted every 1/4 inch.  It did not go as smoothly as I expected.  The wrestling of this under the machine was heavy and awkward, and the angles I sewed (even with GREAT pin basting), tended to make big puffy spots in the middle.  It was hard to flatten those without making tucks and folds.  Extremely frustrating after so much work!


I just love looking at all the angles of this quilt! So fun!!


Please stop back by next week for the rest of the story.  That crazy diagonal long lined quilting really distorted the quilt on the back, which actually improved the design (maybe?); here's to happy accidents!