Showing posts with label marking quilting lines. Show all posts

Sunday, November 23, 2025

No. 18

No. 18
53" x 40"


I love this one so much! The saturation of color, the shapes, the theme. It all rocks!

Making it, I encountered a lot of delays. 
1. The color palette drove me crazy. The first thought was to make the background out of the orange and pink on the left, but I didn't have enough fabric. Wanting to get started as soon as possible, I drove to a local quilt shop to search for something else I could use, or possibly they might have more of what I already had? They did not. I opted to make the background out of the 'so pink it's almost red' and another saturated but lighter pink--the two colors on the right side. However when I got home, I didn't like them as much as I thought I would. 
Then I realized it might be really good with both color sets! Yeah, let's do that!!
Then I ran out of the orange and pink on the left, got out my color swatches, and ordered some more of the same fabric. Then I had to wait for it to be shipped. Agonizing wait!! 
So, I started making the blocks, and ........eventually the new fabric arrived! And, the colors were different! Nuts!! 

Ultimately, I realized that the new colors were lighter, just barely, and would be PERFECT as the background under the light rays, right in the middle. Standing back, and looking at the journey of sourcing fabrics I wanted, the universe had other plans, and this assemblage landed in my lap. And, I believe it is so much better than what I thought I wanted.  

And, this theme played out 2 more times before I finished.
2. I thought the light rays had to be white. White in that spot looked so bad and I couldn't resolve what my head thought and what my eyes saw. My next thought was yellow. Wrong again. Then I tried something less conventional than what my brain wanted, and the light aqua blue looked amazing!!

The last one...
3. I wanted a specific shade of red for the binding. I only had a small scrap of it. The only other red I had enough of was the wrong color--too orangey. So I dug out my samples again, and ordered the red. And, I did not get the memo.  That Missouri Star sends crap damaged fabric. Which after significant effort I managed to get a refund for the fabric, but not for the shipping. I emailed 2 times, no response to either email. Then I gave them a bad review. After a week they reached out, and told me to email them for help. Um...nope, not falling for that again. I guess they wanted me to believe that if they were going to ignore me for the first 2 emails, I should trust them to do what is right for the 3rd email? Suffice to say, I will not be doing business with them again. 

The fabric they sent was faded in a grid pattern, so by definition, not a SOLID color. Very irritating.
I was so frustrated, I decided to just use the red I had, the one that was too orangey, and you guessed it, it was PERFECT. 

Lessons learned: Stop making drama for myself. Expect the unexpected. And, sometimes the wrong color is the right one!

Stitching the HST blocks.

Trimming them to size.

Repeat many many times, and stitch the blocks together. 

Then play with them before committing...because why not? oooh, fun!!

Then quilt the whole quilt. (You can see the minimal stitching below)
Then it is ready for applique!! Yeass!

I typically cut freezer paper in the shape of the finished piece to iron to the back side. With scissors, I cut out the fabric 1/4 " larger for the turned under seam. Next, fold the the seams under, using the paper as a guide, and press in place. Pull off the paper and hand baste the turned under edges. Pin to the quilt, and hand applique. 
This piece uses the last 2 humps cut out from No. 9. They were re-sized and re-shaped for this quilt. 
Next up, quilting the appliqued pieces, and marking the quilting lines. The big lamp humps were marked with 1/4" masking tape. The marking for the necks of the lamps was different. It probably would have been easier to just use a marking pencil, but I have had experiences that were difficult to get the marking pencil out...so.
I pressed freezer paper on top of the neck. And, then traced the shape with a blue pencil. Next was to draw the lines I wanted to stitch. 
I pulled the freezer paper off, and cut it to shape, and then pressed it back on. 
Then I added the 1/4" masking tape to the edges and marked the points to where the stitching would come. 
Then I removed the freezer paper again, left the masking tape in place, and started stitching straight lines to each point. Again, overly complicated...
Finishing up with the orange thread directly on the neck.  You can also see the quilting lines on the lamp shape in this photo! It looks so good!! I am happy!

The last part to show you is the overly complicated hanging sleeve. I don't know why. I cut out a bunch of different pinks and stitched them together. 
I think maybe I wasn't ready to be finished with this one yet? And now that it is finished, I am happy to have it hanging on a wall, and enjoying looking at it every day!

Sunday, August 10, 2025

No. 11 Part 3

No. 11
78.5" x 53.5"

Part 3
Taking a negative and turning it into a positive. This was made from the outtakes of No. 9, and has been turned into the central theme of No. 11. Working on this project was so very helpful. I firmly believe that art heals. Gardening also heals and helps manage my depression and anxiety. So when it is too early in the season to work in the garden, this project was a perfect distraction!

Note, while this quilt does not technically have any half square triangles, it was the next in this new series of work. And it was made from parts from a quilt that does have a lot of half square triangles. It feels like it belongs, and so I am keeping it here.

After the background was quilted, I appliqued the flowers and stems by hand, and then I needed to quilt the flowers. I used a cutout freezer paper template (pressed into place), to help design the quilting lines for the flowers. The 1/4" masking tape is a bit difficult to turn such tight curves smoothly, but it gets easier as the curves get bigger. 


Ready to free motion quilt now! (and then repeat the process for the other 3 flowers!).
To finish the edges, I saved the very last color at the ends of the gradients for the binding. My binding was going to be 1/4", so it blends seamlessly with the color strips. 

I also opted to extend the flowers into the binding. I don't know why, it just looked right to me.
Last is the hanging tube, label on the back, and photographing the completed work. We took it up to the top of Mount Bonnell for a "quilts in the wild" photo! I didn't realize it was so windy that day, which made it a big challenging! For your viewing pleasure!


Monday, November 14, 2022

Mother Nature's All-Inclusive Rainbow Flower Garden

Mother Nature's All-Inclusive Rainbow Flower Garden
80" x 79"

because nature loves ALL the colors...
and, in nature, diversity is a plus, it makes the entire system stronger.
Something to think about.

This one started when my Juki broke last year.  I had taken it to a shop to be repaired, (where they kept it but did not fix it), and wandered around their shop.  I fell hard for some beautiful florals.  I had an idea that I could stitch them up, mostly as fat quarters, and make a back for one of my quilts.  You can see that post here.

And, though the fabrics were so beautiful, they did NOT look beautiful from my first idea. It was quite a surprise when I tossed them up on my design wall and kept moving them around and nothing worked.  I slept on it, for several nights.  It is hard to give up an idea that has failed.  The thing I kept seeing was circles.  Circles are harder than squares, and I still wanted it to be squares/rectangles.  Fortunately, I did not have time to work on it, so it sat on a shelf waiting it's turn.  

Then I paired those lovely florals with some solids, and I got excited! That's when I realized I wanted this to be a rainbow gradient of sorts. I wanted to drop everything to start this quilt! Surprising how a pile of fabrics can give that adrenaline rush! But my studio was filled with other projects.  It was hard to wait.
Finally, I got plugging away.  I made some quick templates for my big circles out of freezer paper, and started cutting the pieces.
I started digging through my stash to find more colors of the floral fabrics to go into the centers.  There were some, but not enough, so I shopped for even more.  This quilt turned out to be the opposite of what I like to do, which is to make use of what I already have. But, my heart was telling me to go for it, and I am glad I did.  
I also took the time to trim the seams so that the colors did not show through on the front. You can see the dark line where the pencil is pointing.  This is what it looks like right after pressing the seam.

 
Trimming the seam helps this little issue!

Here are a few closeups of the circles and their floral prints:


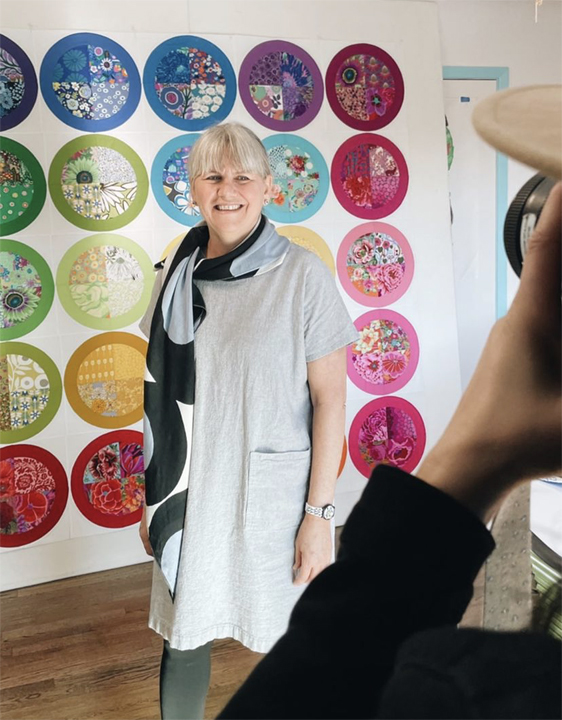
I rushed to finish piecing the top, hoping that I could get it in my photo shoot with Quiltfolk, and I did! They were fine with it being just a quilt top! Good things all around.

photo by Trevor Holloway

I hand basted it. And then set about quilting it.

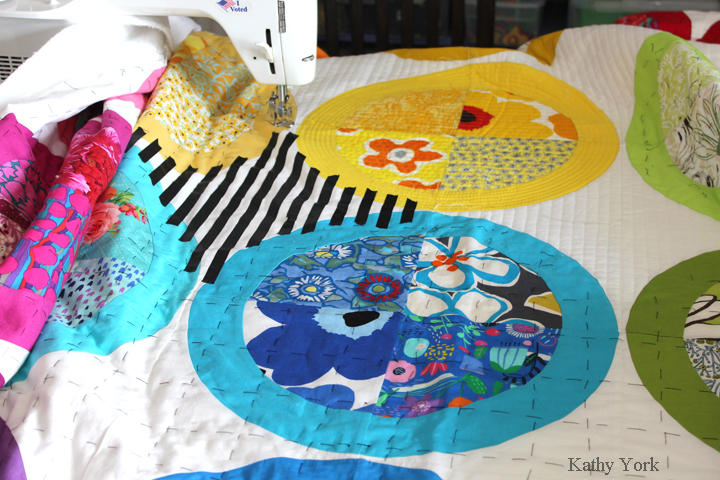
That black masking tape came in handy again when trying to mark the lines for quilting!
The quilt in person is just so lovely. It has a lovely texture and a lovely emotional quality that is warm and inviting.  I just love it. Here's a detail of the quilting:
I can say that the choice of quilting concentric circles around the solid rings was a difficult maneuver.  It was tough to turn the entire quilt around inside my sewing machine.  It was one of those just barely manageable endeavors, but I love the way it looks!
 Photo shoot on the front of my house, a little bit of wind makes the quilt look alive!

Monday, March 02, 2020

Plenty to Go Around: concentric quilting

Plenty to Go Around
80" x 80"
Marking Concentric Circles for Quilting

I decided early in the planning stages that I wanted to quilt this with concentric circles.  And, though I love the loose and organic and uneven concentric circles, that is not what I wanted for this quilt.  As part of WHO this quilt is, the lines need to be exact, or look exact.  It's part of the story.   

I wanted to avoid drawing on the quilt all together, I thought that 1/4" masking tape would be perfect.  It is easy to apply, and easy to pull up if you don't like how it is applied.  It stays stuck pretty well, but does not leave a residue on the fabric.  It is so narrow, that it bends easily around gentle curves.  It does not do that for tight curves, like the first couple of small circles in the center of the quilt.  So, I started with this:


I drew circles with a compass and pencil on the freezer paper, and then cut out the circles with scissors. Next, I ironed the freezer paper circles and hand stitched around the edge.  These are super easy to peel up too! However, once the circle size gets too big, it becomes too stiff and cumbersome, especially if using a hoop.  And, you will know that size when you get to it!! Ha!

For the bigger (and getting increasingly bigger) circles, I decided to measure from the center, using the concept of the circle's mighty radius! Cha ching! I measured, and marked with pins, marking several lines at a time.  It looks like this:


Then I started applying the masking tape, gently curving it as I went around the circle.  I started with the innermost circle, using the pins as suggestions of where the tape should land once it gets there.  It is really good as a suggestion, but more important is the shape of the line as it curves around. Even if not perfect, it needs to resemble the shape of a circle.  Sometimes it will get off the line just a bit, but that inaccuracy can be averaged out with the next rounds of circles. 


After applying the tape, I remove the pins. And then I apply the next round of tape.


Here's an overall view of the pins.  I use a lot of pins, spaced closely.  I suspect that with more experience, I could rely on less pins that are placed further apart.


This pinning and marking takes time, but for me, it makes a significant difference.  If you just follow the previous quilting line with a similar spacing, you can easily get through the entire quilt.  However, if there is a small error in spacing, that error will be compounded and multiplied as you work outwards.  A skilled and experienced quilter will see those errors and gently correct them with each line.  There is also the option of removing lines of quilting to get back to the section where the error starts.  That is frustrating and can be a significant delay to progress.  I am hoping that by marking the circles, I can avoid that.

One further note: when quilting by machine, instead of by hand, it is entirely possible to avoid marking the circles at all because you can use the machine's foot as a guide while you sew.  Disclaimer: I struggle getting those circles even too!


Here's an overall view of my progress so far.  The circles are getting bigger and starting to "outgrow" my rotary cutting rulers.  I have moved up to yardsticks now! And I am pleased that as the circles get larger, they still look like circles! I foresee a point in my near future where my table will be too small and this work will move to the floor.  Perhaps I can get some quilt yoga in as I stretch, bend, and squat to mark these lovely circles!