Wednesday, March 25, 2020

Diverging Distractions

Diverging Distractions
back side of Turn the Dial
71" x 71"


For this side, I wanted to repeat a similar pattern, but instead of having just yellow, with a hint of black and white, I wanted to open up the color palette a little bit.
These cheerful and bright pops of color really compliment the pairing with the yellow. And, I really like how this side is contrasted with the front.  On the front, there is one obvious path.  On this side there are so many bright and beautiful paths.  It would be hard to choose just one way to go, but whatever choice, it will be a good one! It puts a lovely spin on the idea of distractions, which I believe has too many negative connotations in our world. I think we need both!
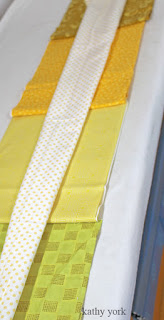
I love the opportunity to play with these lovely yellow-greens! It seems really interesting to me that these are at the center, but the quilt still reads as a yellow quilt.
Here are a few shots of the next couple of rings.  It was interesting to improvise the choice of bright colors to add and where to put them.

And, from the previous post, I did remember to put any pencil markings on the BACK of the fabric. Whew!  Here's a shot of sewing the arcs together.  One of the things I really like about sewing arcs, or curves, is that the bigger these circles get, the easier the curve is to sew.
After finishing the construction of all the pieces, I carefully layered the back, the batting, and the front and then pin basted.  I ran into some trouble while quilting, which you may have seen on this post about my new yellow Oliso iron. As a follow up, I can tell you that alternating quilting from the front side and then the back side really worked to complete the quilt and eliminate the tucks that were forming.
I love how the light shows the quilting lines.  The texture created with these concentric circles is wonderful!!
I was also marking the lines with 1/4" masking tape.  It was easy to apply while the work fit on my table.  As you can see the quilt is hanging off the edges.  So when it got too big, I moved to the floor.  It would have been fine to keep working on the table, and just move the quilt around, but it was not my process.  The floor worked better for me.  I used it as an excuse to bend and stretch! :)

I was also quite amazed that the front side and the back side lined up together so well!  This was especially noticeable when I trimmed the excess off the quilt from the front side, flipped it over, and found that the back was also centered!  Amazing! This is not typically my luck with two sided quilts.

After blocking, and trimming, I just needed to bind the quilt.  Fortunately, since both sides are yellow, it was not hard to pick a fabric!


The last task was to add a hanging tube.  I will post separately about the hanging tube, as it was quite the chore to make one that blended in with the quilt back.  If you look carefully, you can see it in the first photo of the entire quilt.  It is there! Really!

Wednesday, March 18, 2020

Turn the Dial

Turn the Dial
71" x 71"


I have been working on a new quilt since the beginning of the year, and it's finally finished!

I loved working with the yellow color palette, it was fun and inspired me daily.  This side of the quilt is about applying effort over time to reach a goal. I love how this definition for an Archimedes' Spiral is such a perfect metaphor for life.
I started with a minimal number of pieces for the center.  This is the beginning of one of the biggest mistakes I made while working on this quilt.  I drafted a pattern, and then in an effort to stitch accurately, I decided to mark the seam allowances with pencil.  Great idea, but I should have marked them on the BACK of the fabric, not the front.  Still not that big of a problem, if I had caught it early. But, I did not.  I was not sure how to build this quilt, I just wanted it to be yellow.  So, I cut every single piece and pinned it to the design wall before I started stitching.
That's when I discovered the problem.  I did use an eraser, which helped, but ultimately, I had to scrub the top, in some places, with dilute detergent and toothbrush, and then wash it.  Let's hope I remember this the next time, and do it the right way!
Here's an early shot of building the arcs by stitching one piece at a time.  I also discovered that small errors, multiplied over many pieces, lead to an arc that is not quite the right shape.  It helped to compare what I had stitched to the actual paper pattern I drafted, and making minor corrections as I went along.
Here's a shot of stitching the arcs together.  This I know how to do.  No surprises! Thankful! So thankful!

I decided to quilt this in concentric circles, because it is so perfect for this design (and the one on the back).  Here's a view of the beginning, and a few of the threads that will need to be tucked in.
 I love the way it looks while working on it.
Here's a shot while it is under the needle.  I have just made it around a complete circle here.  I use the quarter inch masking tape to help mark my stitching path.
A problem with quilting in concentric circles is that the quilt can become quite distorted by the time you finish.  The center can hump up like a bell.  The edges can be fluted instead of flat.  It is all about keeping perfect and balanced tension.  And, though I have gotten better, this quilt will still need to be blocked.  This requires getting it wet and pinning it on a flat surface until it dries. I used to block my quilts on the living room floor; it was carpeted with a closed loop carpet.  That floor is now concrete, and it is in cat territory.  My design walls are mobile, so that could have been an option, but after a number of years, they have warped, and do not lie flat anymore.  They are not meant for walking around on either.

Thankfully I have discovered a new foam floor (thanks to a tip from a friend).  I got mine from Home Depot, and it comes in lots of colors. (Yes, I got yellow!) The foam floor is perfect, and I can put it away when not in use! And, it can be built in a number of different sizes, depending on how many squares you buy.
Here's a close up of all the pins I used:

And, just for fun, I thought it would be interesting to show an animation of a few of the steps of the quilt 'growing' on the design wall.  I wish I had taken a few more pictures, but sometimes I get so engaged in my work, I forget to take a photo!

I have now learned how to make a gif file!!  Enjoy!

Monday, March 02, 2020

Plenty to Go Around: concentric quilting

Plenty to Go Around
80" x 80"
Marking Concentric Circles for Quilting

I decided early in the planning stages that I wanted to quilt this with concentric circles.  And, though I love the loose and organic and uneven concentric circles, that is not what I wanted for this quilt.  As part of WHO this quilt is, the lines need to be exact, or look exact.  It's part of the story.   

I wanted to avoid drawing on the quilt all together, I thought that 1/4" masking tape would be perfect.  It is easy to apply, and easy to pull up if you don't like how it is applied.  It stays stuck pretty well, but does not leave a residue on the fabric.  It is so narrow, that it bends easily around gentle curves.  It does not do that for tight curves, like the first couple of small circles in the center of the quilt.  So, I started with this:


I drew circles with a compass and pencil on the freezer paper, and then cut out the circles with scissors. Next, I ironed the freezer paper circles and hand stitched around the edge.  These are super easy to peel up too! However, once the circle size gets too big, it becomes too stiff and cumbersome, especially if using a hoop.  And, you will know that size when you get to it!! Ha!

For the bigger (and getting increasingly bigger) circles, I decided to measure from the center, using the concept of the circle's mighty radius! Cha ching! I measured, and marked with pins, marking several lines at a time.  It looks like this:


Then I started applying the masking tape, gently curving it as I went around the circle.  I started with the innermost circle, using the pins as suggestions of where the tape should land once it gets there.  It is really good as a suggestion, but more important is the shape of the line as it curves around. Even if not perfect, it needs to resemble the shape of a circle.  Sometimes it will get off the line just a bit, but that inaccuracy can be averaged out with the next rounds of circles. 


After applying the tape, I remove the pins. And then I apply the next round of tape.


Here's an overall view of the pins.  I use a lot of pins, spaced closely.  I suspect that with more experience, I could rely on less pins that are placed further apart.


This pinning and marking takes time, but for me, it makes a significant difference.  If you just follow the previous quilting line with a similar spacing, you can easily get through the entire quilt.  However, if there is a small error in spacing, that error will be compounded and multiplied as you work outwards.  A skilled and experienced quilter will see those errors and gently correct them with each line.  There is also the option of removing lines of quilting to get back to the section where the error starts.  That is frustrating and can be a significant delay to progress.  I am hoping that by marking the circles, I can avoid that.

One further note: when quilting by machine, instead of by hand, it is entirely possible to avoid marking the circles at all because you can use the machine's foot as a guide while you sew.  Disclaimer: I struggle getting those circles even too!


Here's an overall view of my progress so far.  The circles are getting bigger and starting to "outgrow" my rotary cutting rulers.  I have moved up to yardsticks now! And I am pleased that as the circles get larger, they still look like circles! I foresee a point in my near future where my table will be too small and this work will move to the floor.  Perhaps I can get some quilt yoga in as I stretch, bend, and squat to mark these lovely circles!