Caterpillars part 4
project
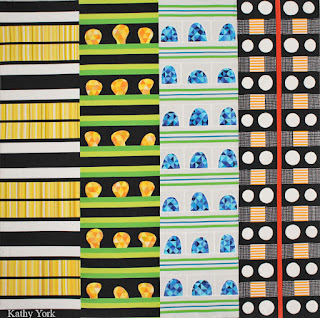
This last panel is based on the hawk moth caterpillar. I don't usually post photos that are not mine, so you can use this
link to google images if you would like to see what a real one looks like. Apparently, there are all kinds of hawk moths and this is just one, but for caterpillars, it's kind of cool!
All the tiny dots....I thought of making them into tiny pieced squares, like really tiny! Then I decided because this moth has big white dots, that I would make the little dots into circle dots too, to repeat the shape. This led me out into the batik studio to try my hand at making lots of little dots. I also calculated the size of fabric I would need so as to not spend too much extra time making dots that I didn't need. Yep, that's how excited I was....until I got started. The first row took a long time, or I had short patience. The next day I put in more rows. The next day I did half of the entire piece, and then finished it up in one more day. This is definitely a 'chore' that grows on me!
That's a LOT of dots!! Right? Are you wondering how many? I was, so I counted them, even the practice dots on the side that would not be used. Grand total: 4663
Then the delicious and wonderful black dye!
I did not stamp these dots. They were individually applied with a tjuanting tool. I did have some fabric very similar to this, but I didn't like it as much for a number of reasons. One was that it was stamped, so all the dots are very consistent. I like how my fabric is more varied, but just slightly so. It has the hand of the artist in it, so there are some places with different densities of dots, and slightly different sized dots. I think for an organic creature this works better. I also like that my dotted fabric looks darker, closer to black.
Then I held it up to the appliqued larger white dots...(these were hand drawn approximation to circles)...
Looks good to me!!
Next step was to cut up the fabric, carefully.
I also pieced some tiny orange and white stripes to go with it, and last the assembly of all the pieces:
Yeeaassssssss! This may be my favorite panel of the four! I am loving that vertical stripe of darker orange-red down the middle!!


