
21" x 21" x 21"


 Just for a little trivia, I did not use any knots in the hand sewing seams. I made a couple of very tiny stitches on the inside and then just proceeded forward.


 About half way through, I started arranging the 'ceiling' layers on my design wall. It made it easier to keep up with the internal color patterning inside the cube.
 I never got tired looking through the holes to see the view.


Sometimes, when I get to a certain stage of making a quilt, the work speeds up for me, in eager anticipation of the finish. This was not one of those kind of projects. I had to deliberately work slowly so as not to tax my hands.
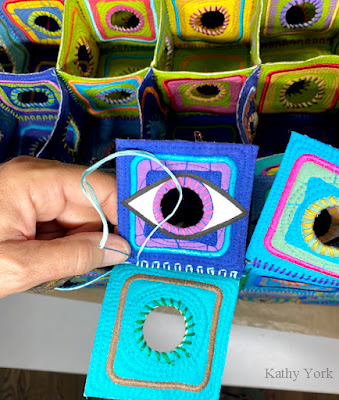
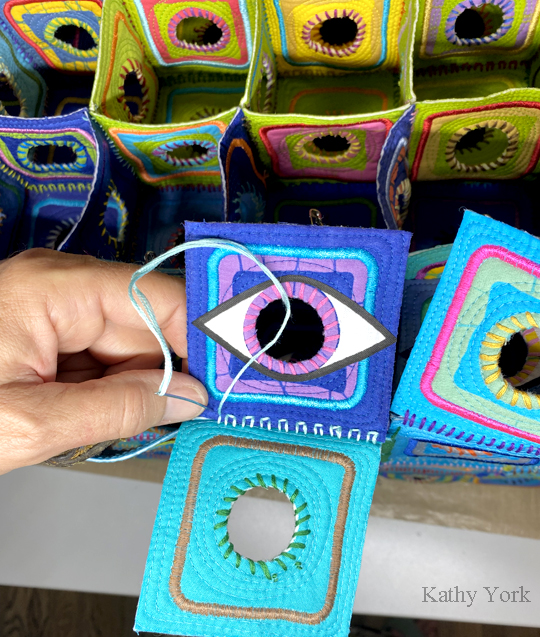
And then there were the unintentional delays. The six stranded floss, at the point where it goes through the eye of the needle, becomes 12 strands. It is hard to push through the little quilted blocks, and much harder when there are also fused eyes to contend with. Sometimes I would just yank it and accidentally peal off the fused eye. Rats! I tried using a tiny miniature iron, I think it is called a Clove iron?, but I would over focus on the eye and the quilt, and not pay attention to where my fingers were, resulting in numerous clumsy burns.
 So, I opted for fabric glue, and clothespins and waited for the glue to dry.


I also found that certain parts of the project were hard to reach at times. The more I added, the taller it got. At one point, I had to switch from my table to a (closer to the floor) coffee table. But then THAT was too low.  My favorite seams were on the sides of the cube, because there are only 2 quilt pieces to join. Very easy!


Here's what that stitch looks like from the inside. You can also see me burying the thread end after taking 2 very tiny stitches in the end.
Here is a sample below of sewing 3 pieces in one seam. In this view you can only see 2 of the pieces. The third piece is underneath, out of sight, until you flip this around.
Here's what it looks like to sew a seam with 4 little quilts in one seam. URGHH!

I only used 2 hand stitching needles for the entire project. This is the first one, after it broke.
 Here is a photo of the inside at the part where it was time to use the little lime green squares! Ah YEASS!


And, here is the part where I got to add the little yellow squares. Predictable, you can probably guess where this single yellow cube is. Which is good, because once the cube is completely sewn, it is too dark to look inside to find it.

It is getting taller and heavier now. A view from inside the studio. Ironically, the quilt on the wall is called Windows...


Getting very close to finishing. This is the very last and top layer to add! Never thought I would see the day!!

The final project. I am not sure this view entirely captures how wonderful this is to experience in real life. So, I hope the process photos have help expand your imagination. The colors in real life are also pretty vibrant!
As for the meaning behind this project, I have hidden some little trinkets inside the cube that are attached in a way that you cannot see them by looking through the holes. I tried very hard unsuccessfully, and I KNEW where they were. You could upgrade your "looking abilities" by investing in some technology, like a snake camera (which I did), and be able to see the hidden trinkets. It is possible to find them this way. And, it serves as a perfect metaphor for hackers upping THEIR game to steal YOUR privacy.


Ta da! It really worked. All those layers and it held up and did not collapse!
And, for inquiring minds. This build has 73.5 square feet of surface area. That is equivalent to 102 in x 102 in quilt. And, all of these little pieces are essentially two-sided, so imagine twice the surface area!!
Compared to the flat version of the project (you can see here), it is even larger than THAT!
No comments:
Post a Comment