Thursday, May 22, 2008

More Garden Inspiration

More Garden Inspiration
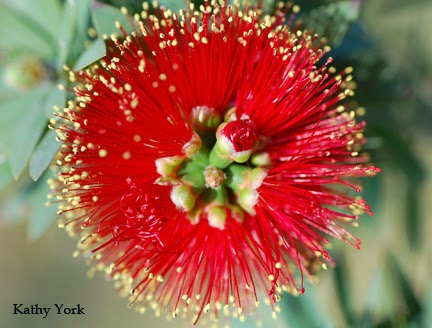
Here's a sneak peak at my part of a new group project coming soon. This one was made with all my own batiked and shibori fabrics. See the flower below that inspired it. I was trying to learn to free motion quilt with satin stitch. It's not nearly as easy as my friend, Frances Holliday Alford, makes it look. And my poor machine practically rattled off the table. It might be time for a new one. Yikes!!


Thursday, February 21, 2008

Where Have All the Jays Gone?

Where Have All the Jays Gone?
SOLD
16 1/2" x 24"
It is the 1 year anniversary since my quilt, Jay Walk, has gone missing. Missdelivered by the United States Postal Service, neither the company that signed for it, nor the USPS knows where it went. The USPS did pay my insurance claim eventually, but it does not begin to replace the loss I feel over my very special quilt being gone. Though I will always remain hopeful that it will find it's way back to me, it is time to move on. I made this little quilt to commemorate its loss.

New stuff: I took the pink shibori fabric from the earlier post (More Distractions) to use for the petals. However, the pink and white just didn't look quite right. So, I colored in the white thread resist markings with Tsukneko inks, yellow and orange. I really like the way that turned out.
The leaf fabric was made using pole wrap shibori. Though less obvious in this photo, I used light colored lime green thread to quilt the upper part of the leaves and a darker olive green to quilt the lower part of the leaves. It makes it look like two slightly different fabrics. What a difference quilting can make! Okay, it's a bit subtle in the photo, but in real life it looks quite lovely.
I made a big effort to make the background quilting more meaningful. In the top half, I quilted seven big circles. These represent the seven missing jays from Jay Walk. And in the bottom half of the quilt, I used a square stipple design to represent the buildings that make up the back ground in Jay Walk. In the sky I quilted words to go with the sentiment, and to help them pop forward just a bit more, I colored them with a very dilute white Tsukneko ink.

Tuesday, February 19, 2008

Auction Quilt Completed!

Auction Quilt Completed!
The quilt and pillow sham are reversible. The back is a whole cloth batik. Connie Hudson quilted it with a variegated thread in a beautiful spiral pattern on her longarm machine. It was a perfect design for the front and the back! I am hoping it will raise some money for my kids' school.

Friday, February 15, 2008

Home at Last!

Home at Last!

My quilt, Visions of Grandeur, has been traveling for 2 years in the Fine Focus '06 exhibit. I felt very honored to have my quilt included in this incredible collection of small art quilts. You can see and read about the other quilts in this exhibit by going to,
http://www.finefocus.blogspot.com/.

Wednesday, February 13, 2008

More Distractions

More Distractions
The first is a shibori experiment. I love the bright pink! This sample is made by pinching the fabric as I hand sewed big running stitches. Pull the strings tight and then vat dyed.
This yellow was posted earlier. It was made by dipping a napkin holder in wax, and then dye painted.

After boiling out the wax, I restamped it with an interesting irrigation cap end that I found at Home Depot. The waxed parts saved the yellow, then I dyed it again with orange. It looked fabulous, but I took it one step further.

I tore off a section, and without boiling the wax out yet, I painted the center of the circles (to save the orange), and stamped again with the irrigation cap (to save more orange). Then I dyed it again with red. The red dye was too old, and most of it rinsed out, but the resulted dark orange was just so lovely! I can't decide which I like better, the yellow & orange piece, or the yellow & orange & reddish???

Tuesday, February 05, 2008

Dyeing Experiments 101

Dyeing Experiments 101
 I needed a dark backdrop for a quilt, so I decided to make it navy. However, I didn't want a solid navy, I wanted something subtle with a little interest in it. Okay, I totally missed 'subtle' with this experiment! I folded this cloth in half and then twisted it very tight, stuck the ends through the loop made in the other end, and then vat dyed. I did not expect such high contrast, but I loved it. Then the dilemma, though beautiful and very interesting, it wouldn't fit my needs. So, I took it to the garage and started batiking circles. Some I left as rings, others I filled in. Then I over dyed it, navy and turquoise.
I liked the new results even better! Someday I will get around to quilting this as a whole cloth. It is large, about 60" x 120". Of course, I will have to find a back for it....which will lead to more dyeing experiments, more fun, and more learning!


Tuesday, January 29, 2008

Fun with Napkin Rings

Fun with Napkin Rings


I was shopping for a D shaped napkin holder, which I never found....but I did find these two others, and one napkin holder (the yellow fabric). I see the world differently now. The first thing that comes to mind when I see ANY new object is....how can I dip that in hot wax?? And then quickly followed by, what color will I paint it? The last photo is with the wax still in and freshly painted with dye (mixed with print paste). Even with the print paste, I am still having issues with the dye running under the batik. I am painting on a glass surface. I think I need to try a stretcher frame.


with wax and dye painted in between the shapes


Saturday, January 26, 2008

Dive Right In...Shibori!


Dive Right In...Shibori!
I saw an example of this type of shibori in the book, Shibori, The Inventive Art of Japanese Shaped Resist Dyeing, and thought I'd give it a try. I planned to use it as a training exercise for the back of a quilt I am working on. It took an hour to do about one panel, and before I invested multiple hours in sewing the entire cloth, I cut out this strip and dyed it to see what it would look like. It is about 60" long and 10" wide, and has a total of 6 circles. I like it so much I don't want to sew it back on to the original now. It is hanging on my studio door, a simple cloth, beautiful in it's simplicity.


Tuesday, January 15, 2008

Fun with Backs

Fun with Backs


Problems photographing outside on a windy day? OR....A fabric too happy to stand still? I pick the later.

It is time to start thinking about quilting the auction quilt for my children's school fundraiser. Only problem, I forgot to make a back for it. I was planning to tie dye a whole cloth, like a rainbow. I did that once before and was quite happy with the results. Plus, children love rainbows, so I thought it would be popular. And this one was supposed to be a rainbow, but an accident happened and it totally changed the color scheme. It seems like every time I think I know what I am doing, something happens and I learn something new. This time I learned that if you are dye painting on a table, and your cloth is much bigger, it can slip off when you turn your back! Thus the warm tones, already painted on, landed on top of the white half that had yet to be painted in cool colors. I decided to go with the flow and camoflage the serendipitious 'error' and paint the rest in warm colors. See if you like it!

The other thing is this. I don't know why, but before I started, I decided to do batik instead of tie dye. I love all the circles. They look so happy and seem to have so much movement. The real trick after dyeing is of course getting the wax out. I do this by boiling. And since this is a large whole cloth, 60" x 72", it is really quite a trick to get the wax out. And I don't know why I insist on taking an easy project and making it harder on myself. Art? Some creative vision that needs expression?? Regardless, I have added an image for you to see the pots I use for boiling out the wax. The one on the stove (on the left), is my old 'Big Pot' for boiling out wax. I use it for fat quarters, half yards, and maybe up to a yard. The really big pieces won't even fit in this pot, so I had to get a bigger pot--it's the one on the right. It was a cheap steamer I found at the grocery store. It is not meant to boil multiple gallons of water. I found this out when I tried. It is made of aluminum, and when you fill it with water, the top of the pot looses heat so quickly, even when the lid is on, that you can't quite get the water to boil. However, it does get hot enough to get the wax out.

Little Fish Prototype

Little Fish Prototype

I knew this fabric would look great for fish!! This first image is before the fish was stuffed (and before his mouth was painted). The second image is to show a close up of his mouth. I finally figured out how to sew an open mouth. And it happened quite by accident....I couldn't quite turn this tiny tube inside out. Then I realized that it was much better this way!

I am also getting better at quilting the fins using tweezers. If you would like to see the quilting, be sure to click on the photo for the close up. The pectoral fins are made from putting fusible webbing on organza. When you cut the organza, the webbing sort of seals the edges and keeps them from fraying. And, as an added bonus, it is very easy to attach the fins to the fish. I used a tiny clover iron and just pressed briefly at the forward edge of the fin. This fish and his other friends will be debuting on a new quilt called Little Fish. But, due to the nature of that quilt (ie., very tedious and large), it will be many months before I have a picture to post.