Wednesday, November 03, 2021

Both Sides Now

International Quilt Festival Houston
Both Sides Now
photo by Sherri McCauley

photo by Karen Alexander

I am so proud and thrilled that my exhibit, Both Sides Now, was so well received in Houston this year! And it wouldn't have been possible without the support of Becky Navarro at International Quilt Festival and my sponsor Juki America. I did not go, but had asked for photos of the exhibit from friends. I was overwhelmed with the response I got!!  Christi Carew and Suzin Stern took photos of almost every side of all the quilts!  Becky Navarro, Sherri McCauley, Susan Tennison, Frances Ledenbach, Karen Alexander, Cheryl Dagan, Deborah Boschert, and Carol Jones Morrisey took photos of the exhibit, many of which were showing people looking at my quilts!  And Andrea Brokenshire and Sarah Ann Smith took videos of the exhibit so that I could see what it looked like if you were walking around! Sarah's video included her commentary of my work which was quite lovely and gave it a very professional vibe that I LOVED! I am overwhelmed and so thankful for all the kindnesses! A big thank you to all so that I could share photos here with you!! It was almost like being there!

You can see both sides of every quilt in the exhibit, along with artist statement for the quilts, and links to the quilts while I was making them, in the new tab at the top of my blog, Both Sides Now

Turn the Dial (left), Flow (right)
photo by Susan Tennison

Neurodiversity (left); His and Hers (right)
photo by Carol Jones Morrissey

Bloom (left), Butterflies (right)
photo by Karen Alexander

Caterpillars
Photo by Christi Carew

Diverging Distractions
photo by Suzin Stern

There were some unexpected surprises as well!  If you stood in the right place the lighting went through some of the quilts, showing both sides at the same time!  

Scarcity
photo by Deborah Boschert
The front side of Scarcity, Plenty to Go Around.
Plenty to Go Around
photo by Cheryl Dagan

Seeds
photo by Deborah Boschert
The Bloom side:
Bloom
photo by Suzin Stern

No Earth, slightly more subtle in the lighting effects, but also looks amazing from the back especially when you can see references of the front side.
No Earth
photo by Suzin Stern
The front side of One Earth:
One Earth
photo by Suzin Stern

I have been asked the following questions. So I thought I would answer that here.
Q: "Why make two-sided quilts?"

A: 1. I always wonder while I am working, WHAT am I going to put on the back of this quilt??? Sometimes my brain starts brainstorming ideas that relate to the work that I am currently making for the front.  It is like expanding an idea to include another perspective of it.  Like working in a series, albeit, a limited series of only two.

2.  I really enjoy designing quilts more than quilting them (now that I am older).  This gives me an opportunity to design TWO quilts for each quilt I have to quilt.

3. Storage space for my work is getting smaller and smaller the older I get and the longer I make quilts.  This is a somewhat futile attempt to have two quilts fit into the space in my closet of ONE quilt.

4. I love, love, love the challenge of making a two-sided quilt, where the meanings or stories connect with both sides.  Even better, is when the quilting motif ties the two together. 

Q: How do I line them up so well?
A: It is really difficult to line them up.  The back side gets smoothed and taped to the floor, front side down.  Then I put a layer of batting on top of that.  Now I can't see anything of the back side, and I have to lay the front side on top of all of these, top side up.  
1. Sometimes you can fold the quilts into quarters and put a safety pin on the folds at the very edges.  Then you have 4 points you can line up.  

2. I also found that you can FEEL the seams of the back side of the quilt through the quilt sandwich and make subtle adjustments to line up the front with the way that the seam feels. 

3. Sometimes the actual design of the two sides does not have to line up perfectly for it to work.

4. For the quilt, Turn the Dial, I used the same pattern for the front as the back, and tried to sew accurately.  That one got off about 1/2" in some places, but it is not noticeable. 

If you have more questions, please ask in the comments section.  I will be happy to try answer your questions.  I am not sure if the Blogger platform will notify you that I have posted a response, but I try to answer every comment I receive, so check back!

Two Halves
photo by Suzin Stern

the other side:
Overlap
photo by Suzin Stern

I also had a few comments about the hanging tubes.  Those were dreamed up for each quilt, BEFORE the backs were made.  Especially in the quilt above, I had to make sure when I was batiking the two panels that were sewn together to make Overlap (above) that I made enough to include an extra piece with the correctly spaced and dyed stripes to add the hanging tube! And it worked!!

I don't think anyone commented about my labels....
I sewed those INSIDE the hanging sleeves, as per request from the exhibit curator and coordinator, Becky Navarro at IQF.  The labels usually go on the back side of a quilt.  If these were indeed two-sided quilts, with no front or back, then the label would need to be hidden from view.  Done!
Last, there is a giveaway on my Facebook page for free two-sided postcards from the exhibit.  I was planning to hand most of these out at the festival, but then didn't go.  I will send them internationally too, so if you want one, sign up there.  Posting has been delayed, because I have run out of envelopes.  They have been re-ordered and I am hoping a Nov 15 post date. 


Thank you for stopping by!

Wednesday, October 27, 2021

Complements - project

Complements 
project about 80" x 80"

from the outside railing of my house...at least the colors look right in the natural lighting. 
(Please excuse the weights on the top holding it in place.)

It started like this. I was actually nervous about cutting such giant pieces of solid fabrics.  I also was in short supply of a few colors like pink, and turquoise.  So I went ahead and cut with fabrics I already had and decided it looked better with the slightly different colors (though you may disagree).  And, then I decided to mix it up a bit more with a few of the other colors, the red, and yellow, and lime green....
LOVE it!!


Then I worked one color at a time to build up blocks of pieced strips to fill in between the solid stripes.

I love the scrappy look of all these different prints!! The cutting was not the fun part, so many fabrics to pull, cut, and then re-fold.  Sometimes I like to fussy cut, so that I can showcase something interesting in one of the prints even if the scale is small.
Or this one with the cat and birds!
And the hummingbird! So sweet!

I sewed the narrow strips in groups of 10 to make a block.  Each strip is generally cut only 1" wide, though there were a few exceptions! 

More shots of all the pieces!  There were A LOT of pieces!!
Then I sewed the blocks together, and finally sewed the long lines of blocks to the solid pieces.  Easy and fun!

A last shot of a 'behind the scenes' photography shot, I hung the quilt top on my deck railing for the first photo.  When I went back upstairs to take it down, I saw how beautiful it looked through the rails!


Wednesday, October 20, 2021

On my design wall:

On my design wall:

I am thinking ahead. I have several quilt tops completed and ready for batting, a backing, and quilting.  I have been making two-sided quilts for so long now, I am struggling to put something simple on the backs of these quilts. One of the reasons I like my series of two-sided quilts is because I get to design twice as many quilt tops for the amount of quilting I have to do. I really like the design part. However, the two designs must be meaningful and complement each other. The quilting motif must work for both of them. This is a struggle. And, I question why I require this of myself, but I do....

I had a plan for one of the quilt "backs". So I bought some fabric. It was supposed to be easy and look fantastic (in my mind). Here are the fabrics I bought:

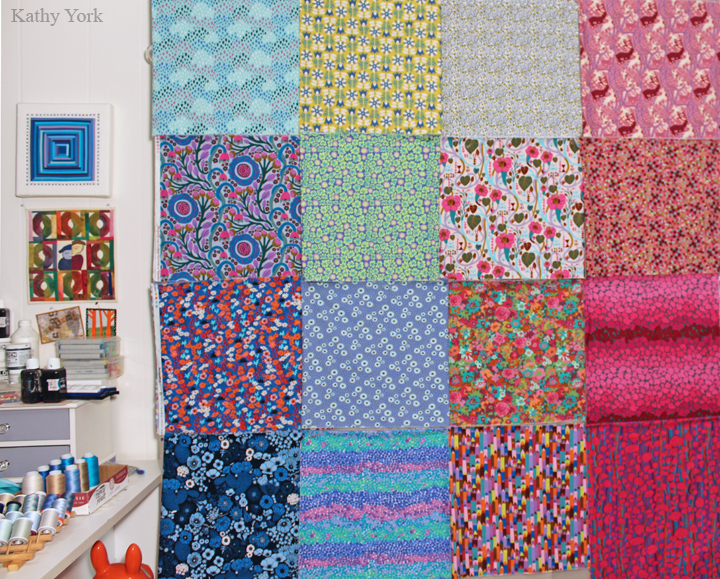
After washing them and tossing them up on the board, and rearranging, I still was not happy with how it looked. So, I made a new plan and did a fabric pull of solids to go with these florals.
The new plan is a lot more work.  Of course it is! And, I am happy with the new direction, but now I am again not certain if it will be a quilt back or a whole new quilt! 

Wednesday, October 13, 2021

Sewing Machine Woes

Sewing Machine Woes
My sewing machine broke, and it broke hard.  It has been an long and emotional 7 weeks.

I have found several things on my journey.
1.  There is an inherent conflict of interest between the shops that sell new machines and fix old ones.    
2. I am very emotionally attached to my machine. It is the tool that allows me to express myself through my art. It was quite the rollercoaster of emotions trying to get it repaired and did not always make for sound decisions on my part. 

3. When having to accept undesirable eventualities, the garden is a great place for solace and healing. If I want to feel better, all I have to do is step outside. 

The longer story:

On Aug 18, I was happily sewing along on my Juki, quilting a rather large quilt, and I pushed the thread cutting button on my machine, like I have done 1000 times before, and heard a loud clunk.  It sounded like the motor was seizing and the needle would not go up or down.  I cut my quilt loose from the machine, panicked and then took a deep breath. The quilt was 3 days from being finished and I had a show deadline approaching.  I really wanted to enter this quilt, and now I did not have a way to finish it.

The next part took 2 days. Eventually after taking the bottom off the machine, and then comparing the insides with it's cousin, the 98E, I saw the problem.  There was a chunk of plastic in the wrong place, physically preventing the wheel from turning. Carefully turning the machine to different angles and using a pair of tweezers and gravity, I was able to remove it.

During the next 2 days, I also started making calls to various shops.  One shop said it would take 8 weeks to repair. In my mind, this was not a good choice.  Aside from the fact that my deadline was too close, I just couldn't imagine life without my machine for that long.  Little did I know that my path would eventually take just around 7 weeks....

Since the wait was so long, I thought I would get the process moving.  I found a replacement part online and ordered it.  It took 8 days to arrive, which was phenomenal that the part was both available and that it shipped and arrived so quickly.  Although, in my impatience, it felt like an incredibly long time!


All the shops had really long wait times. I picked the shop with the shortest turn around time, 3 weeks, and dropped it off.  I told her what the problem was and that I had the replacement part.  Without looking at the machine, the sales person tried to blame me for the problem by telling my that I oiled my machine too much.  She also did not ask me first how frequently I oiled the machine....?? A $40 deposit was required.  After a few days they told me that the repair was too extensive, and that I would have to ship machine back to the manufacturer for the repair. I don't understand why they would let me leave the machine with them if they don't fix the problem that I brought it in for? Instead, they used 3 days of my time, charged me $40, did not make any repairs, and then used scare tactics to try to get me to buy a new machine from them (now for $40 off!). They warned me that sending my machine to Juki would cost at least $600 and it could cost even MORE!

I reached out directly to Juki, and over the course of a few emails, they gave me the name of a repair person in Georgia, Elbert Shirley, who could both do the repair and had worked for Juki manufacturing and repair for many years. I had reservations about shipping my machine all the way to Georgia. This was a mistake on my part. 

the insides of my Juki TL 2010Q,
part of the broken cam that is still inside the machine is circled in red

I started calling EVERYONE, in town and out of town. Now at least I understood that I needed to specifically ask if they could do the repair that my machine needed, a thread cutter cam assembly replacement.  The original shop (with the 8 week wait time) did NOT do that repair. The next shop had just lost it's mechanic.  Another shop did not work on my brand.  I found a mechanic in a small town willing to do the repair in 10 days to 2 weeks.  It was an hour drive there and an hour drive back.  Then I sat and waited.  

During the week wait time, I began to wonder if the machine was now a big door stop?  I could not afford a new machine.  I decided that the time was perfect for selling my Juki QVP sit down long arm machine. It is great machine but I don't use it anymore because I mostly use a walking foot now, and it does not have that ability. I eventually found a buyer who offered me less than half my asking price.  I had tried unsuccessfully to sell this machine at least 3 other times, so I agreed.  It was worth a LOT more than she paid me, but it was enough to buy a replacement machine if I needed to.

Then things started breaking around my house.  My freezer. My sink disposal. And I made a big mistake on my taxes and would be paying a hefty penalty.  It ate up almost all my earnings from the sale of my machine. Despair started settling in.

Meanwhile, at 10 days of dropping off my machine, I called, and was informed that there were only 4 machines ahead of mine. They were also angry that I called, they wanted me to wait to be called.  At 2 weeks, I called again, and was informed that there were now 12 machines ahead of mine, and that the first estimate was wrong. Again, they were very hostile on the phone. I remained calm, friendly, respectful, and asked for a new estimated date of completion.  At 3 weeks, I called again, and they hadn't started the repair yet and put me on the phone with the actual repair technician. That did not go well, so I decided to go pick up the machine. They gave me a receipt which had an anticipated 5 week return time date. Another 2 hour total drive time.  This was a complete bust.  A waste of my time, and gasoline. And a significant loss of trust.

I was frustrated, overwhelmed, angry and disappointed and almost out of money.  I decided to ship my machine to Elbert in Georgia, which I should have done from the start. 
my Juki at FedEx, there is a reason why it feels so heavy....

It arrived in 5 days, and he immediately made the repairs because I had sent the parts with the machine.  In 2 days it was ready to ship back to me!!!  I had it back fully functioning and purring like a kitten in a total of 8 days. Total cost of repair including shipping, parts, and labor was about $320. Expensive, but doable, and much less than a new machine. Perfect!

The frustrating part is that it seems like everyone knew about Elbert and how great he was but they were not going to tell me about him.  One shop eventually let on they that knew about him, but when I was seeking a repair, they were very quiet. I expect the people I do business with to be professional and honest. In this chase for the all mighty dollar, perhaps my expectations are unreasonable? I also bought fabric from two of the shops that I sought help from. And, now I am left wondering if I even want to continue supporting them on that level? Am I being too cynical? What do you think? 

In the interim, I joined a new Juki facebook group and garnered significant new information that will help with my older Juki, the 98E. That information, (and new part for $50) has now made it possible for my old 98E to quilt perfectly again, and will now be my backup machine. It had been skipping stitches and was repaired at 2 different shops, but was not actually repaired.....which was why I bought the TL 2010Q.  (....and the reason why I question the ethics of businesses that both repair old machines and sell new ones.  This is not just a theoretical conspiracy theory, it has been my repeated experience).  On the timeline of this experience, the 98E was up and running the day before I got my 2010Q back from Elbert.

On the up side, I have freed up some extra space by selling the big quilting machine (space that I love and is now usable space!!!) I made 2 new quilt tops (on my Pfaff), and have started a 3rd. I now have 2 Juki's that are sewing wonderfully! I lost my momentum for finishing up the quilting on the large quilt when this all started.  I have decided NOT to worry, I will get back to it. I have given up on several exhibit deadlines and I am okay with that. 

Wednesday, October 06, 2021

Charmed: part 3

Charmed: part 3
80" x 80" quilt top

Charmed, after the swap out

I finished the quilt top!! Yeah! And then I changed my mind....

So I took out the very lovely block (below) that I am so very fond of, and made a new block.  The improvement is vast, and I am happy that I listened to my heart.  This "out-take" will most likely find a new home in a pillow.

I was also hoping that by the time I posted this, I would have a back for the quilt ready to go, but alas, I do not.  I also do not have a sewing machine that I can quilt this on, yet.  My Juki has been broken now for 7 weeks.  But that is a long story, and one that I will save for another day.  

Meanwhile, a great time to talk about photographing bright colors.  It is a lot more difficult than it should be.  Digital cameras "think" the perfect photo is one with people in it, so it adjusts what it sees to try to find some "skin" tones....or so I have been told.  I do find it hard to get the colors right with digital photography.  I used to shoot in the RAW mode, but because of computer "issues" I now do not have a way to open RAW files....sigh... Another good option is to take a photo outside with diffuse natural lighting, but that can be hard because of the time of day and needing a set-up large enough to accommodate large quilts, which I can make, but it is cumbersome and weather dependent.  Today, I am sharing a photo of the quilt top taken on my laundry line, (which is not tall enough).  I took it at twilight, and I am pleased with the colors here.
Overall, the colors look softer and not as harsh and brassy as the photo taken with studio lights. Even minor adjustments of lighting and color can make the overall effect not seem true. I also took a photo of this quilt at noon.  The harsh light and stark shadows are not a good option.  Here is a side by side comparison. 
When I finish the quilting, I will take the time and effort to set up outside because the light is so much better.  It won't be a quick photo shoot, and I will need to take my design walls outside, but it will be worth it! :)

Wednesday, September 29, 2021

Charmed, part 2

Charmed, part 2
project 80" x 80"


Here are 4 blocks! The whole quilt top will have 16 blocks. And, I am currently in the process of replacing one of the blocks that I did not think played well with the others.  A photo of the entire quilt top will be coming soon!  Meanwhile, I like the way the alternating values of the quilt add movement and kind of make it sparkle.  The bright colors make me think of the fruit flavored chewy candy known as Starbursts. 

From the perspective of the whole quilt on a computer screen, you can not see all the lovely details of the fabrics this quilt is celebrating.  So I will include some closeups of the individual blocks, and the some of the fabrics. A few more:


And some closeups of the cute fabrics!
Love these cute tulips and the hedgehogs!

The lovely pink llama fabric!

Great little owl!
Capybaras!!

I love this bold graphic!
And, there is always room for some Yaks!!

Pop up polar bear! He looks so friendly, as if he is saying "hello there!"

Climbing trees!

Wednesday, September 22, 2021

Modern Meets Modern

Modern Meets Modern
at the International Quilt Museum
Sept 16, 2021 to March 19, 2022
I am feeling fortunate, grateful, validated, valued, honored, proud, happy, and overwhelmed! My quilt, Hidden Messages (center bottom row), is now in the permanent collection at the International Quilt Museum and has been chosen for an exhibit called Modern Meets Modern.  
I haven't seen the exhibit in person, but their website has an amazing presence of the exhibit.  There are gallery photos (where I got these images), individual spotlights on each quilt, and a virtual 3D gallery where you can "walk" around and look at each quilt and explore at your own pace.  Videos of the artists talking about their quilts will be included soon. 

I am having trouble even finding the words to express how wonderful this exhibit looks to me.  Something along the lines of a "real" museum, and it is a tremendous honor!  The lighting is exceptional! It is perfect for lighting the quilts, but also not overexposing the fabrics to harsh light that would make the fabrics fade; something that is not typically considered in quilt shows or many other exhibit venues. 

There is text on the walls! I love how this spells out the concept of the exhibit!

And they built these incredible little beautiful sculptural box thingies with concepts on them that pique your interest and are so visually appealing!


And as a special note, my quilt was meant to be backlit, so that you can see the letters hidden under the appliqued colorful circles.  However, putting that much light on the quilt is bad for the fabric.  So they built another one of those lovely instructional pretty boxes specifically for my quilt to show what my quilt would look like if it had been backlit.  It is perfect!!
Many thanks to IQM and all the people who were involved in putting this exhibit together! Hope you will get a chance to see it in person, and if not check it out on their website!

Wednesday, September 15, 2021

Charmed - project

Charmed
project 80" x 80"

This one started as a challenge to myself.  It is named after a charm pack swap I purchased from Bunny's Designs, and I was wondering what to do with the unusual assortment of little 5" squares of very interesting fabrics!

I decided to try some monochromatic blocks and I was drawn to my comfort zone, the log cabin block.  I decided to alternate rows of solid colors with rows of prints to build my blocks.  Each block would be BIG, 20" square.  To select the solid colors, I opted for a gradient.  Here are a few combinations that are auditioning for a spot.

After cutting the strips the right sizes, which I am embarrassed to tell you that I did wrong on a number of occasions, I started selecting which prints to use.

I have been collecting fabric for many years and I have a lot to choose from.  Ultimately, the ones that worked were the ones that had a bit of value difference compared to the solids that surrounded them. 
Here is a close up of the pink block:

I selected squares for the center from larger scale prints.  I LOVE these polar bears!!
It was also fun to include some of my own batiked fabrics in the mix.  These lovely oranges (and one red), helped extend the possibilities for the orange block.  I tried not to use any fabric twice, but in the end, I did, at least a few times. 

It was really fun to revisit my old fabrics and mix them with the new ones.  It brought up so many memories, it was like looking at a scrapbook.  Next week, I will show you more of the fabrics I used and some of the completed blocks!  And, I will likely want to put something interesting on the other side!  At least this kind of sewing has been a really fun way to stay busy while I wait for my sewing machine (that I use for quilting) to be repaired.  

Wednesday, September 08, 2021

Both Sides Now - Moo Postcards

Both Sides Now

International Quilt Festival solo exhibit


I am starting to think that this really might happen!  All my quilts are now in Houston.  And, I have designed a postcard to promote and celebrate the event.  And, the cards have arrived!  They are so beautiful!  I am very happy with the quality of my cards from Moo.

My optimism and hope are fighting with my realism and weekly covid projections.  I am astutely aware of the Covid crisis in Houston.  Their hospitals are full.  The Delta variant is rampant.  I had a solo exhibit in Houston once before, in 2016.  It was fantastic! I stood in front of my exhibit almost every hour that it was open.  I talked to so many wonderful and supportive people.  But things are different now.  If I decide to go, I will only be there for one day.  I am worried that very few people will come to the show.  And, my brain knows that fewer people will be safer. I am also worried that having so few people at the show will be another difficult economic hit for the Houston show to remain operational. I am worried that the people who will come are the ones who won't be vaccinated and think wearing a mask means hanging it so low that their noses stick out (which personally freaks me out). Many of my friends are not going.  It is the most special time every year because this is when we connect in person.  It feels like my presence there will be a constant reminder of everyone I love who is not there.  I expect to feel some grief with my bliss of my show, which complicates things. In a word, bittersweet. How appropriate that the event will iterate the theme of the exhibit, two sides: FEAR and JOY.

If you end up going to the show, I hope you will stop by and see my exhibit! And, drop me a line! 

As for these postcards, I have some special envelopes coming that fit these postcards perfectly! That way, I will not have to put an address label and cover some of the images.  The first 5 are already spoken for, but the other 20 are for you, first come first serve.  Comment on my blog that you want one, (when I get 20 comments, that means they are all spoken for) and send me an email (kakiyork at gmail.com) with your mailing address. I will send you one!