Wednesday, November 27, 2019

Bounce

Bounce
56" x 79"
(the back side of Unfinished)

I love how the trajectory of this bouncing ball shows movement. The ball cannot avoid the force of gravity, just like the things we cannot avoid and must eventually accept. Putting a positive 'spin' on it, I like the metaphor of dealing with life’s difficulties with a “bounce”! 

I took a detail photo of the front side of the quilt and manipulated it in Photoshop to make a pattern for the ball.  The apparent weave and colors of the ball are the same as the woven pattern on the other side, just distorted into a sphere.  
Then I printed it onto freezer paper (don't try this!!), and the heat from my printer jammed the wax side of the paper into the printer.  So, that didn't work!!  Next step, tape the pattern onto a glass window and then by hand, trace the shapes onto freezer paper, and cut out all the shapes.  I then ironed them onto the fabric and cut out the pieces with a seam allowance.  Next, I decided the order in which they would be sewn together.  I glued down one seam allowance with the washable glue stick, and then glued it in place on top of the piece it would be sewn to.  By holding it up to the light, I could see when the edges of the freezer paper were nearly touching.  Then I hand sewed the pieces down, one at a time until the entire sphere was sewn together.
When the entire sphere was completed, I peeled the paper off the wrong sides and gently washed the glue out.  Then I turned under the outer edge and appliqued to the quilt.
It kinda seemed like a lot of work for all the little balls, but I have never done a technique like this before and it was fun to learn something new.  And it worked! The spheres were all stitched onto the back after the quilt was quilted. I am satisfied with the design elements and colors.  All is good!

The next step was to photograph the quilt.  How to photograph a white quilt?  It is really NOT easy.  I set this up in my living room.  It required a lot of furniture moving, and a lot of cat hair clean up, all before I started hanging the white drapes on the sides, and covering the rug.  I just really wanted all the light in the room to be white, I didn't want my photography lights bouncing off my shiny blue concrete floor and casting a hue onto the quilt.  I couldn't decide if I should light this scene with the lights on the outside of the hanging sheets, or bouncing off the insides of the white 'box'.  I tried both.  Still it was hard to get even lighting.  Overall, this worked pretty well, but I still think I have some more to learn when it comes to photographing white quilts.
Here's a close up.

Thanks for stopping by!  When was the last time you tried something new?


Wednesday, November 20, 2019

Unfinished

Unfinished
56" x 79"

I am happy to share with you a quilt I completed last year.  This quilt is all about what is left unfinished in life.  It helps me think about all those things I still want to do and prioritize how I spend my time.

The white in this quilt is so white that it blends in with the background of my webpage.  Therefore, I have shown it here on the background of my grey design wall.  It is a simple design, one that I am certain I have seen before, but I haven't seen quite like this. I love the colors and the meaning it holds for me. Also, it was fun to make because it wasn't one of those projects that I agonized over.

I bought all the fabrics for this quilt, no dyeing involved.  I LOVE the vast choices of solid color fabrics that are available today!

This one started with a sketch with my Copic markers.  You can see that I cannot color inside the lines!! Ha! As I worked, I took several photos along the way.  When I finished, I realized that I like the piece that was colored with less color, than the final product.  So, that's what I chose for the quilt.


Next up was deciding the size of the quilt, how much fabric to buy, prewashing the fabric, pressing out the wrinkles and cutting all the blocks.  Whew!  Then the assembly via sewing machine.


After the top was completed, I pin basted it, and then decided because of the way I would quilt it, that I would take the extra step of machine basting it, so that I could remove all the pins, and hope the quilt sandwich would possibly shift less while I was stitching.  This did work well, but I also spent extra time taking out the machine basting stitches.  In the end, it was worth it!


Here's a shot of all my threads and bobbins lined up and ready to go! Spools of Masterpiece by Superior are my current favorites!


I also decided that I would free motion quilt this because that would allow me to go back and forth within each color block.  I could have chosen a walking foot, but that would require turning the entire quilt a lot, or quilting backwards with the walking foot which I have not learned to do yet.  I don't mind the free motion, and for short sections, the straight lines are achievable.  They are not all perfect, and that is just fine with me.  I like that free motion quilting doesn't look like a computer did it, or maybe just MY free motion quilting doesn't look like a computer did it! Ha!


I love the texture I have created with the straight line quilting and the tiny unquilted white square blocks.

This one is also a two sided quilt.  I will post about the back next week.  Cheers!

Wednesday, November 13, 2019

Overlap

Overlap
48" x 48"
(the back side of Two Halves)


This is the back side of my quilt, Two Halves.  In a sense, it is the opposite of the front side.  The front has two different halves that meet in the middle.  This side has two different tracks that overlap.  The overlap represents the places we have in common.

Some things I love about this design.  One, I LOVE the actual design, of the lines going off every side.  I love their exactness, and I love how the process let me dye one color on top of another thus creating transparency.  I love the colors!

To create this, I had to make the quilt top in two halves because my batik frame wasn't large enough for one piece of fabric. I drew lines in pencil to help guide the application of the wax.  Then I filled in with dye.  Here's a photo of what it looks like when the dye spills in an area where it is not supposed to be.  I hate it when that happens.


Then I rinsed, and dried, and boiled off the wax, and then repeated with the second half of fabric.


Next, I drew the lines for the second set of overlapping lines, and very carefully applied the wax.  It looks grey in the photo below.


Then the fun part!  Adding the dye now shows me the exquisite colors of the overlapping areas!


This is where I stand in wonder and awe.  How can something so simple be so crazy good?
Unfortunately for this one, I used a red dye that had died. And when I rinsed it out, all the red went with it.  This SHOULD have been a signal to reapply another red dye, but I skipped that step, because something about the 2 orange lines also looked good to me.


The above photo was before the wax had been boiled off, and the two oranges look slightly different.  After boiling the wax off, the two oranges became almost identical, when it was too late to change it.  So, I had to repeat the "mistake" on the second panel so that it would match the first.  Here they are, hanging together for the first time on my clothesline outside, getting a little rinse with the hose.


Yeah baby!  Works for me! A little measuring and then sewing the two pieces together and it was ready for the basting in the quilt sandwich and quilting.


I was also rather pleased with another aspect of the planning of this quilt, and that was to make the back design a bit too large.  Then when I finished quilting, and trimmed the quilt to it's final size, there was a section left over that was large enough to make the hanging tube.  So the colors and the size perfectly match and appear somewhat invisible.  And if not invisible, at least not distracting from the overall design.


I am pleased this quilt.  I like how the front and the back complement each other. I hope you like it too!

Thursday, November 07, 2019

Two Halves

Two Halves
48" x 48"

Two halves make a whole.  If only it were that simple for our country....

This quilt began as an abstract. As I worked, the horizontal line became more prominent.  Could it read as a landscape?  Perhaps the orange blob is a setting sun? As time passed, the idea of 'two halves' started settling into my thinking.  In this quilt both halves are quite lovely, and if you look at the shapes and colors, they have a lot in common, though they appear different.  If feels like a metaphor for the two halves of our country, split and polarized.  And it could have been more obvious if I had selected more patriotic colors.  But, I didn't start this quilt with THAT in mind, it is just something that percolated while I was cutting and stitching.  And, it kinda of proves the point of why abstract art can be so great.  It can appeal to many different people, for many different reasons. The meaning lies in the eye of the beholder. And if you stare at it long enough, you can feel and think, and perhaps connect on a totally different level.  A great goal to aspire to!

And now for those of you who like to see behind the scenes, many, many more photos!

Cutting strips of fabric efficiently includes lining them up and cutting multiple layers, and multiple colors all in one slash with the rotary cutter.


Pairing up the colors and getting stacks of blocks ready to sew.


Half way there.  Next up, cut these blocks in half and then stitch in another center piece.


I make all my blocks too big.  This is because my sewing skills are not that accurate.  I like to square up the blocks and then trim them to the right size before sewing them together.


This is one of my favorite parts.  Finishing up a set of blocks and placing them on the design wall.  I have, on more than one occasion, taken them all down and tried different designs.  So much fun! I also like this stage because of all the negative space.  Just having partial block completion looks good to me!


Then it is time to baste the layers together and let the quilting begin.  This quilt did not feel that big until I had to quilt it.  Quilts with lots of tiny blocks get really heavy, really fast and are more difficult to quilt.

A close up of the quilting.  Notice the walking foot.  It is really working and doing a great job!


Next week, I will post photos and process of making the back.  Yes, this is a two-sided quilt. Thanks for stopping by.


Thursday, October 31, 2019

Plenty to Go Around Part 7

Plenty to Go Around Part 7

This is one very cheerful post.  As a few of the batik designs I made did not look so hot in the making. In my mind, I could see the final product, but I wasn't sure if it was real or not.  Today, I am happy to share with you that both ideas actually look okay, and not, in fact, a disaster!

The first is the chickadee, which I have blogged about before here:
This is the photo of where I left off:
Add here is the first one I have finally appliqued to the quilt top:
I am still debating whether or not to add eyes to the birds. As for the logistics, there are 48 birds to sew on.  For each one, I change thread colors as I go around the little bird, about 6 times.  I have completed about 15, so I have a bit more work to do.  Ha! I will have to say that the hard part is the little beak.  It is so hard stuffing under the fabric edges into such a small space.  Yikes!
After the first ring of birds was completed, I started on the little orange flowers. I have also posted about the making of those orange flowers here.
When we last left off, the fabric looked like this:
Then they were all individually cut into stacks waiting to be appliqued to the surface:
And now, I have a few sewn on with their edges turned under.  I love how sweet and delicate they look!
And once again, on both of these, a batiked white section was used to define the shape of the design and make the hand sewing just a bit easier because the white blends into the background.  You can see it on the tail of the chickadee, and just ever so slightly on the stem of these orange flowers.  I am feeling rather pleased that this idea was useful and worked the way that I planned. 

Meanwhile, progress on this project is still a bit slow, but is moving forward.  I have a funny story to leave you with.  I was working on this project in a public location and a large group of older women (ok, my age women!) came by.  One of them asked what it was that I was doing and I replied making a quilt.  Then another looked a bit shocked and said, "a proper quilt? All by hand?"  It was all I could do not to get offended or even laugh at the suggestion that if it wasn't all by hand then it wasn't proper? I just smiled and said yes.  Because in this case, it will all be made by hand.  I don't know if it will ever be considered proper though, at least not once I finish the imagery for the back side.  Stay tuned!

Monday, October 07, 2019

Plenty to Go Around: Part 6

Plenty to Go Around: Part 6
The Illusion of Thin Stems

For the spiral flowers, I wanted really thin stems.  Unfortunately, if I cut the fabric as thin as I wanted, I was worried there would be too much fabric to be able to stuff all the edges underneath.  So, I came up with this for a solution. I would try to match part of the stem with the background fabric (which is white). I batiked some simple 1/2" wide white stripes and dyed it blue.
Then I cut some strips and folded the ends, and then the sides.  You can see a sample in the photo above.
Then I pinned them under the flower heads, slightly to one side.
I hand stitched in place along the dotted line above, and then folded the remaining piece over.
With all the edges turned under, I pinned them in place.  I think they look kind of scary with all the pins, and was afraid my thread would get caught on the pins while I was sewing.  I was pleasantly surprised that the thread did not catch much at all!  After a quick applique stitch with matching blue thread along the blue side of the stem, they are done!
It is a narrow little stem, but half of it fades into the background, and only the blue part is obvious.  The actual fabric stem is now about 1/4" wide, but just the blue part is 1/8" wide. There is a delicate and playful quality to it.  I am really pleased with the way this little experiment has worked!  Adds quite a "pop" to the little spiral flowers! I love how cute it looks with the fawns and the hummingbird! Very sweet and happy!


Tuesday, September 24, 2019

Prism #1

Prism #1
14" x 14"


The inspiration: I was playing with Copic markers again, and wanted to explore the idea of transparency.

So fun!  I decided to make a small quilt, just to see how it would look.
I decided to use batik so that I could see exactly how the dyes look when overdyed. Overdyeing also looks different than just mixing two liquid dyes and getting that color.

But first, I confess, my dyes are really old.  So, I tried a dye test, both to rule out dyes that no longer worked, and also to select which dyes I liked enough to use for this project.  Here is the red test, though, it also has a few oranges in it.
The above photo was taken just after the dye was applied.  Now, I had to wait overnight and then rinse them out.  As suspected, one of the dyes faded to a very light pink.  However, I did find the red that I liked, it was the second from the top.
Next up, applying the wax for the first round of warm colored dyes:
While the space was still a bit empty, I decided to play with the design of the second round of dyes.  I cut card stock into strips, cut them into different lengths, played around with the layout and took a photo for later reference:
In retrospect, I find it funny now, because I did not refer to the photo when I was ready for the next step.  However, sometimes, you just have to respect your own process, and apparently, this was mine.
Let's add some dye!  Yay! I mixed 14 different warm colors and set about to fill in all the spaces with dye.
Yes, that's the dye test at the bottom (it is dry), the dyes on the top part of the photo are wet (thus darker and more intense).
After waiting overnight again, rinsing with a garden hose, and boiling out the first layer of wax, it was ready to be re-pinned to the frame and the next layer of wax added.
This is the part where the excitement builds.  I simply cannot wait to add the next set of colors.  Off to the laundry room to mix up 8 cool colors.
Just WOW!! I LOVE this so much!  Also, wondering how something that looks so simple can be so much work??
Waiting, waiting, overnight again for dyes to process, and then rinse again with the garden hose before boiling out this round of wax.
Unfortunately, there was another delay.  Patience is not my strong suit, but there was no choice.  One of the green dyes was too old and washed out at this stage.  Into the trash, and remix another green while the wax is still on.  I painted the new green over the old washed out green, in just one little rectangular space, and then had to wait again, overnight.....
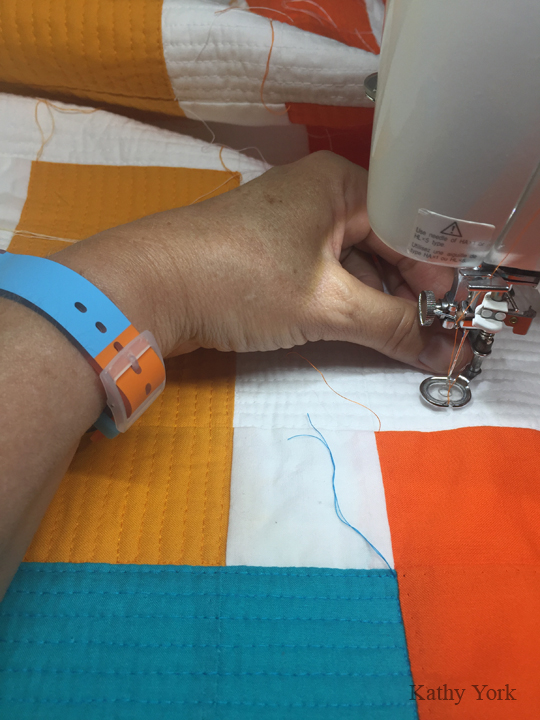
Then, a mad rush to quilt it.
This also had a bit of a delay.  I did about a third of the quilt in dense matchstick style quilting.  It looked so bad, it made me want to cry.  Instead, I sat down with the seam ripper, and pulled it all out.  Then I had to attempt to "erase" all the holes made by the sewing machine needle.  I got lucky and this worked amazingly well.  Then I set about to quilt in in a minimalist design.  Ha, ha! This still required changing the thread colors a bazillion times. But, it looks good, and I am happy. Whew!
I decided to go for a very simple facing to finish the edges because I did not want a binding to interfere with the simplicity of the design elements.
And while I was working, the sun was setting, and THIS HAPPENED!!!
The light coming through the window separated and made a rainbow on the back of my little quilt, hence the name, Prism.
The finished quilt:
This will be my entry for Splash of Color, which is a member's challenge at Visions Art Museum. It opens Oct 19, 2019 and runs til Jan 19, 2020.  It will be available for purchase and half the proceeds will go towards supporting Visions Art Museum.  Fantastic!