How to Build a Picture with Batik
The
IQA quilt show in Long Beach California coming soon, and I have been meaning to share with you the process I used to make my quilt,
A Few of My Favorite Things. It will be debuting in a special exhibit called "Edges".
First, I will explain that batik is simply putting melted wax on fabric. The wax 'protects' the color of the fabric from successive dyes. With that in mind, I set out to 'paint' this picture with batik. First I lightly drew the picture in pencil. In the first pass, I divided the canvas into mostly light blue for the sky, and pink for the rock. Notice that right in the beginning, I have waxed the sections that will eventually be white in the end, namely, the rope, and the tape on my hands.
Now that I have the pink and blue sections marked out, I will start adding wax marks to sections that I want to eventually stay light pink and light orange. You can see the wax marks in the photo because of the angle of the light, the wax looks shiny.
Next, I will overdye with darker pinks and oranges, and then repeat the process. Each time I add a new dye color, I will wax part of it to preserve the new color, and then dye again. While working on the section that will become my body, I also use the wax to set off areas, like dams, and dye paint inside the section.
On the next photo you can see many layers of color built up and the last layer of dye the browns and blacks. They only go on a few sections of the quilt, so those areas have been protected with a line of wax drawn precisely around them. After the darker dyes are added, they make the bright colors from underneath really pop with the contrast.
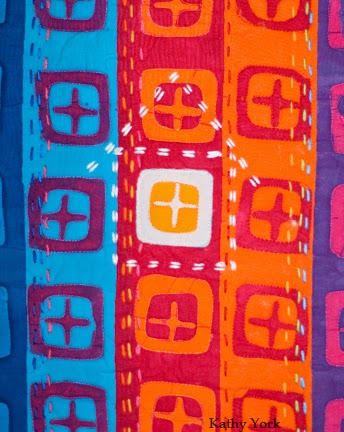
On this close up, you can see the many different colors of hatch marks to make the surface of the rock look like granite crystals. Though probably not noticeable, I also used a layer of bleach discharge to make some marks as well. The colors are further enhanced by using different quilting threads.
For the final image, the words have been quilted on the sky, but they don't show up very well. I printed the words on freezer paper and ironed the paper strips on the quilt. Then I quilted, right through the paper, and tore the paper off. It made beautiful little letters, but even with white thread on the blue background, hard to see. That's is why in the last step, I added the white ink. I simply colored inside the already quilted lines.
Thought you might like to see the back of the quilt to see the quilting lines.