back side of Turn the Dial
71" x 71"
These cheerful and bright pops of color really compliment the pairing with the yellow. And, I really like how this side is contrasted with the front. On the front, there is one obvious path. On this side there are so many bright and beautiful paths. It would be hard to choose just one way to go, but whatever choice, it will be a good one! It puts a lovely spin on the idea of distractions, which I believe has too many negative connotations in our world. I think we need both!
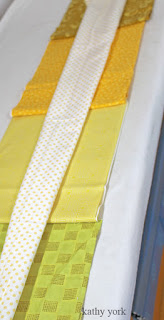
I love the opportunity to play with these lovely yellow-greens! It seems really interesting to me that these are at the center, but the quilt still reads as a yellow quilt.
Here are a few shots of the next couple of rings. It was interesting to improvise the choice of bright colors to add and where to put them.
And, from the previous post, I did remember to put any pencil markings on the BACK of the fabric. Whew! Here's a shot of sewing the arcs together. One of the things I really like about sewing arcs, or curves, is that the bigger these circles get, the easier the curve is to sew.
After finishing the construction of all the pieces, I carefully layered the back, the batting, and the front and then pin basted. I ran into some trouble while quilting, which you may have seen on this post about my new yellow Oliso iron. As a follow up, I can tell you that alternating quilting from the front side and then the back side really worked to complete the quilt and eliminate the tucks that were forming.
I love how the light shows the quilting lines. The texture created with these concentric circles is wonderful!!
I was also marking the lines with 1/4" masking tape. It was easy to apply while the work fit on my table. As you can see the quilt is hanging off the edges. So when it got too big, I moved to the floor. It would have been fine to keep working on the table, and just move the quilt around, but it was not my process. The floor worked better for me. I used it as an excuse to bend and stretch! :)
I was also quite amazed that the front side and the back side lined up together so well! This was especially noticeable when I trimmed the excess off the quilt from the front side, flipped it over, and found that the back was also centered! Amazing! This is not typically my luck with two sided quilts.
After blocking, and trimming, I just needed to bind the quilt. Fortunately, since both sides are yellow, it was not hard to pick a fabric!
The last task was to add a hanging tube. I will post separately about the hanging tube, as it was quite the chore to make one that blended in with the quilt back. If you look carefully, you can see it in the first photo of the entire quilt. It is there! Really!


2 comments:
Wow, a masterful job of blending the hanging sleeve, it blends so well as to be almost invisible. I'm very impressed with this whole quilt.
Thanks so much Susan!
Post a Comment