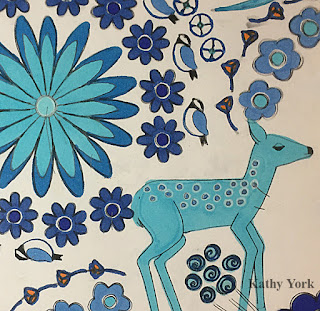
project: approximately 80" x 80"
If you have been following me on Instagram or Facebook, you may have already seen a number of posts with images of my new project. You can see the posts so far with the hashtag, #plentytogoaroundquilt.
I started with the idea of some fawns and flowers and the image of a kaleidoscope. I began drawing everything with a pencil on tracing paper. Once I found a satisfying shape, I would outline it with a black sharpie to increase visibility. Then I duplicated the shapes, many times, all by hand, and cut out the pieces. I taped together a giant piece of white paper for the backdrop. Then I was able to move all the pieces around to play with the composition. Since all the pieces are tracing paper, they tended to move with the slightest breeze. So I would tape them into place, which also means removing or cutting the tape when I changed my mind and decided to move them to a different location. I started with a six sided symmetry, but did not eventually choose to keep it. This was disappointing for many reasons, but mostly because I just didn't want to give up the hexagon. When I opted for the 4 sided symmetry, all my design problems just fell away, and I felt the joy I was seeking.
Next, I took a photograph of it, and then printed it. I played with copic markers to get an idea of the colors. I thought of just using photoshop to fill the areas, but it was too tedious, and the markers were more fun! I also made a few mistakes, so I just printed a new page to color....several times.
Then it was time to start making all the pieces. It took me about 12 weeks. There were a total of 28 fat quarters that I drew, then batiked, and then dyed. Some took multiple batik and dye steps. Some also used bleach discharge. The first eight fat quarters I made, which included 4 fawns, and 4 big flowers, were great for practicing, but ultimately did not work for the project, so I had to start over. All had to be boiled to get the wax out, and washed and ironed. It's a lot of work, but so incredibly satisfying!
I look forward to sharing the progress I have made so far. Stay tuned!


1 comment:
Gorgeous!
Post a Comment