
looking for my voice in mixed media

Last year I took a wonderful on-line mixed media class called LifeBook. I was very hesitant about doing this kind of class, mostly because of my unfamiliarity with the materials. I didn't even know what gesso was! I learned all kinds of wonderful lessons from the myriad of teachers. However, since finding my artistic voice in fabric, I had a lot of resistance towards the weekly lessons because I was copying what the teacher was doing. It rubbed me the wrong way. I hadn't found my artistic voice in this mixed media thing and it was very frustrating!
And, one of the optional features of the class, was the sharing of our work on a private Facebook group. It was inspiring to see the range of work being done. It was amazing to make something that looked like the teacher's lesson when I had no confidence at the start that I could draw or paint like that. It was incredible to see other people learning the same thing! But, it also reinforced my need for finding my own voice because there was a small subset of people that were able to learn from the lesson, but create their own work. It didn't look like a derivative, it was original and wonderful. Must learn to crawl before walking, and so I set off to both learn and find myself.
Now, it is a year later, and I am happy to tell you that about half way the year, I branched off into a mini-side project to find my voice. I started with half-sized pages, and just devoted one side per day to some play. I also journaled each day on the page. My intention was two-fold, in that I wanted to both find my voice, but also use the work to keep better track of my diet and exercise towards a more balanced and healthy life. Lofty goals! The daily work on the journal page kept me accountable to myself, and for the most part it worked!
What was most interesting is that the act of playing with watercolors, and colored pencils, and gesso, and paint, and markers was the THING that brought balance back, the rest just followed. I gave myself permission to not have to plan every page, just play, on a daily basis. The outcome of a beautiful page was no longer important. Every day that I did this somehow freed me up to have a good day, a productive day, a healthy and balance day, and the ability to be flexible to what the day offered. It was surprising to say the least! Um, bad art leads to happy life? Not exactly, it was just PLAY leads to happy life, and my form of play was with the colors on the page, and experimenting, and journaling about my life.
The end of the year came and I had almost 200 pages done. I had also finished the LifeBook class, and the last lesson was about binding the pages we had worked on throughout the year. I did not want to bind my artjournal pages in the same format, but I became motivated to see an alternative, one that I found on Youtube with SeaLemon. Every question I had, she answered in one of her bookbinding tutorials. I experimented with types of binding the pages in groups of 50 pages each, and found that I really like it when the art pages lie flat when opened. I also like being able to see the entirety of each page.
The first one, I simply glued the edges of the pages, and then wrapped it in a hard cover. I put about 5 layers of glue on the spine side of the pages, with heavy books weighing the pages down, and waited for them to dry in between coats. I used cardboard from the drawing pads and used Mistyfuse on some of my own batiked fabric for the covers. That was easy and also quite attractive because I love my batiked fabrics! I also have a small watercolor journal that was bound this way, and I know that sometimes the pages fall out, so I added a small tie to the outer edges. The results?
 | |
| This one has a page coming loose |
 |
| here's the tie to hold the loose pages in. |
Try number 2. For this one, I sewed strips of folded watercolor paper to the edges of each group of 2 pages. This allowed me to stack the pages into small signatures and then sew the signatures together.


This took more time. I had to cut the strips of paper, fold them, punch holes and sew to each individual page. Then there was some time involved in sewing the signatures together. It was all easy though. This technique had the advantage of the pages opening flat, and you could see all the art, with the exception of the 1/4 inch covered by the white folded strip for the binding. I also added a hard back cover with the Mistyfused fabric on the outside.
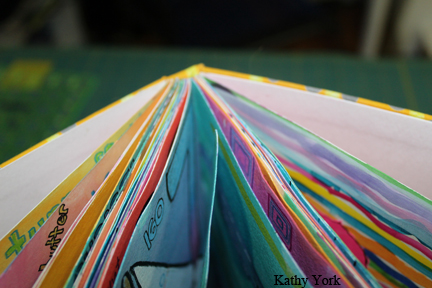
The last one uses a form of a copic stitch. And even with hard covers for the front and back, there is no cover for the spine.
 |
| Spine from the top view |
 |
| spine from the side view, love the rainbow threads! |
 |
| Here is the last page with the back cover. I selected some wrapping paper for the inside cover. |
All in all, a fun project, one that I will continue into this year. And, now that I know a bit about binding, it makes pre-planning my pages a much easier prospect! Here are some images of the art I made this year.


4 comments:
I did the same as you in signing up for Lifebook 2015 in that quilts are my primary forte. And, like you, I learned a great deal. Of course I now have a whole new set of supplies to store in the sewing room! Appreciate your take on the various binding methods, as my pieces are not settled into a journal yet. Your work is lovely, and I like how you branched off to do your half-pages.
Nancy,
I meant to talk about all the supplies! It was really hard to integrate space for this project when my quilting studio was already so full. I found it difficult to have a space to play with paint and then clean it up so that I could work on my quilts. However, if the paints were put away, then it was more difficult to find the initiative to get them out again. I have rearranged my studio furniture it feels like a billion times to make this work! But, it was worth it. I finally have storage and a flat working space that is accommodating to my different needs. Thanks for leaving your comments. Nice to meet someone else who did the class and is a quilter!
Thanks for the link about the book binding. I have been thinking about learning this, but haven't the money for classes right now. So, I will have a better look and think about how and when I might have a go at it.
Sandy in the UK
Nancy thanks for sharing your artistic journey. I myself have a love for both fabric and all kinds of art. My studio is small
And I am always bouncing back and forth with wet and dry materials. You inspire me today to get out my
Art journal! Thanks!
Post a Comment