
Mother Nature's All-Inclusive Rainbow Flower Garden
80" x 79"
80" x 79"

because nature loves ALL the colors...
and, in nature, diversity is a plus, it makes the entire system stronger.
Something to think about.
This one started when my Juki broke last year. I had taken it to a shop to be repaired, (where they kept it but did not fix it), and wandered around their shop. I fell hard for some beautiful florals. I had an idea that I could stitch them up, mostly as fat quarters, and make a back for one of my quilts. You can see that post here.
And, though the fabrics were so beautiful, they did NOT look beautiful from my first idea. It was quite a surprise when I tossed them up on my design wall and kept moving them around and nothing worked. I slept on it, for several nights. It is hard to give up an idea that has failed. The thing I kept seeing was circles. Circles are harder than squares, and I still wanted it to be squares/rectangles. Fortunately, I did not have time to work on it, so it sat on a shelf waiting it's turn.
Then I paired those lovely florals with some solids, and I got excited! That's when I realized I wanted this to be a rainbow gradient of sorts. I wanted to drop everything to start this quilt! Surprising how a pile of fabrics can give that adrenaline rush! But my studio was filled with other projects. It was hard to wait.

Finally, I got plugging away. I made some quick templates for my big circles out of freezer paper, and started cutting the pieces.

I started digging through my stash to find more colors of the floral fabrics to go into the centers. There were some, but not enough, so I shopped for even more. This quilt turned out to be the opposite of what I like to do, which is to make use of what I already have. But, my heart was telling me to go for it, and I am glad I did.

I also took the time to trim the seams so that the colors did not show through on the front. You can see the dark line where the pencil is pointing. This is what it looks like right after pressing the seam.


I rushed to finish piecing the top, hoping that I could get it in my photo shoot with Quiltfolk, and I did! They were fine with it being just a quilt top! Good things all around.
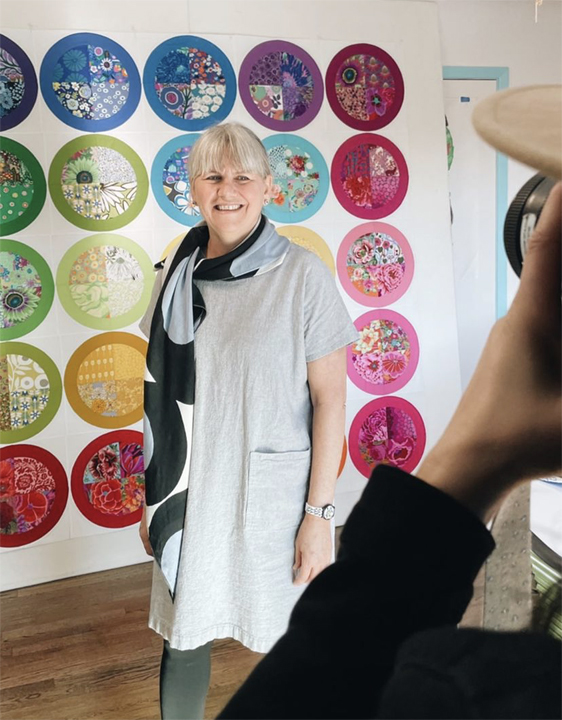 |
| photo by Trevor Holloway |
I hand basted it. And then set about quilting it.

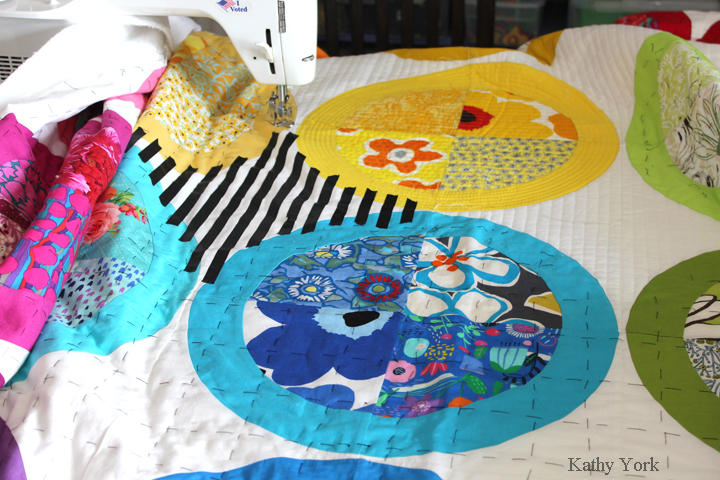
The quilt in person is just so lovely. It has a lovely texture and a lovely emotional quality that is warm and inviting. I just love it. Here's a detail of the quilting:


Photo shoot on the front of my house, a little bit of wind makes the quilt look alive!
1 comment:
This is just lovely:-)
Post a Comment