
No. 2 and No. 4: Quilting
45" x 45"
When I put the wrong sides together for this set of quilt tops, I could feel a really large bulk of seams at every intersection. I decided I would try the trick I did on THIS quilt, to see if it helped reduce the bulk.
Thus began the trimming of the batting with scissors...

My original plan was to use straight lines across the designs of No. 4, which would include horizontal and vertical straight lines. This also requires a stellar basting job of lining up the top and back of the quilt so that the straight lines will work on both sides of the quilt. Unfortunately, this plan failed miserably despite my best efforts. The quilt tops kept shifting while I was working and the tension was really bad when I got anywhere near the intersections of all those bulky seams.
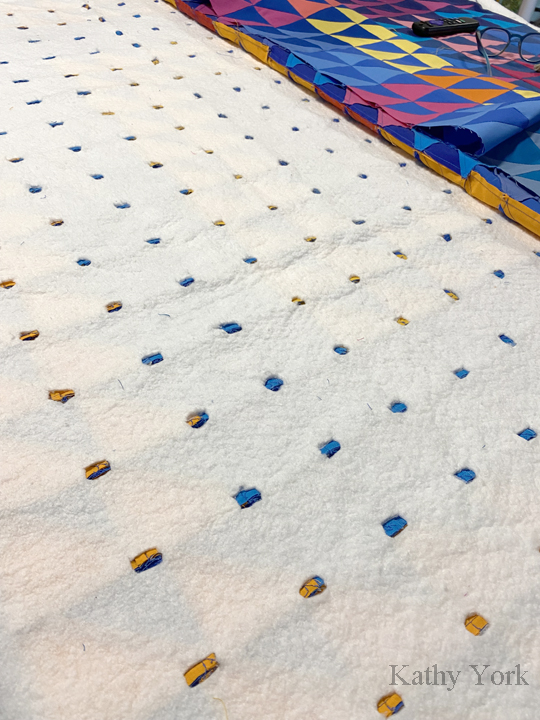
I opted to rip out the quilting, and try something else. The new plan involved quilting circles in the centers of each square. It looks rather interesting, and has the bonus of not touching those bulky seams.
The trick was still to keep the quilt tops lined up. I solved it this time by using pins. I would pin through the seam on the top and feel for it underneath. Then I would make sure that it also went through the seam on the back before passing it back up. When stitching, I would have at least 3 sides of each square pinned before starting the quilting. And I worked slowly, one block at a time.

The circle motif was easy to follow with free motion quilting by making a lot of freezer paper templates and pressing them on. They could be reused multiple times. The trick was pressing them on without the iron accidentally melting the pin heads...oops! I learned that it was a sequence problem. Iron the paper circles on FIRST, then put the pins in to line up the seams (front and back).

I also decided that a hanging tube on either side would look bad, so I opted early on to make an internal hanging tube, like on THIS quilt. The quilting of the circles was compatible with the internal sleeve, and I lived happily ever after. ;)

Last, I thought I would save time by making these two quilts into one quilt, that way, I would only have to quilt it once. Sadly, it did not save time. And it seemed like a lot of extra work for two quilts that I did not particularly like. The best part of this project was finishing it and moving on. It is all part of the learning path of working in a series, and I am okay with that.
I love those quilted circles. An excellent secondary pattern.
ReplyDeleteGreat! I never would have thought of these if I hadn't made this a two-sided quilt!
ReplyDelete