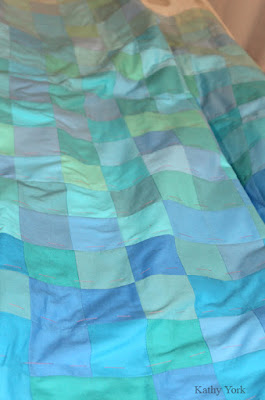
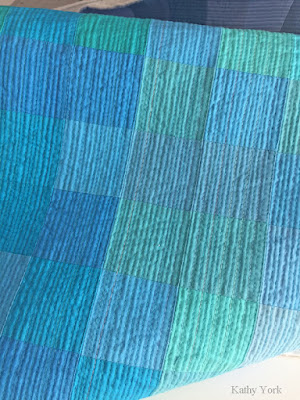
Oil and Water -the other side of Ocean Blues
74" x 74"
I grew up by the ocean. I love the beach and everything that goes with it. When I was little the beach was frequently covered in sticky goey tar balls. They were hard to get off your feet, until you learned the trick about baby oil. The older I got, the more littered the beach became. When I go to the beach now, I have to pay a fee for a sticker for my car. The monies are used to bulldoze and scrape the beach of seaweed and trash (I'm assuming). And, I am not convinced that this is the best thing ecologically for the beach and the organisms that actually live there. There are also trash cans every 100 feet along the driveable part of the beach.
When I graduated college, I got some temporary work on a research vessel. We called it Coring for Dollars and had some T-shirts made up. The program was run by a university professor who used the income from it to fund his own research and graduate students. We were taking piston cores and sampling them looking for traces of oil. I sliced up the deep ocean mud and put it into labeled bags that were frozen. Back at the lab, the mud was dried, and then extracted with multiple solvents. The left overs from the solvent washes were then tested in several different ways, including UV Fluorescence Spectrometry and Mass Spectrometry. If they found the "fingerprints" of an oil deposit, the results were sold to oil companies who then made a bid to drill for oil there. There is a huge amount of work and money that goes into oil production, and this is only the exploratory part.
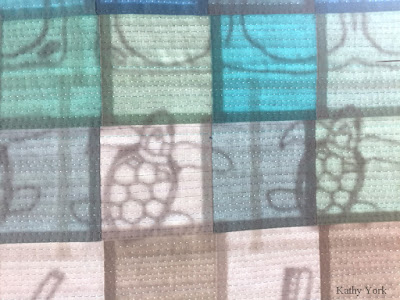
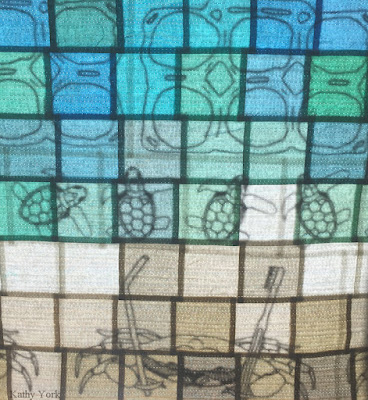
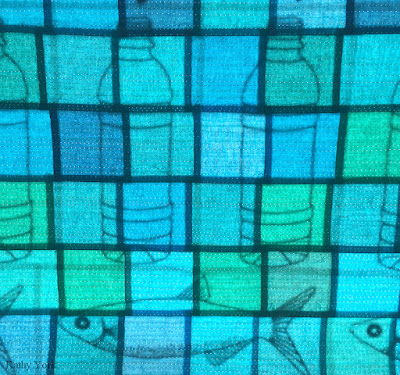
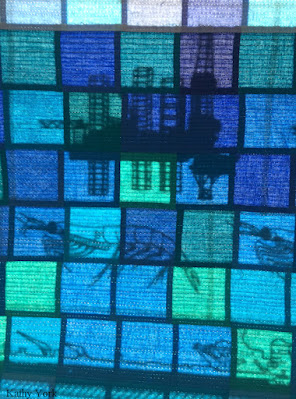
The thing is this. Oil is an incredibly valuable resource, but it is limited. It is not like a tree that can be regrown. Once we use it up, it is gone. Finding it and getting it causes huge environmental damage. Using it, or burning it, is also causing massive global climate change, but I will save that discussion for another day. It is not a hard sell to convince anyone that we waste it. But it seems like it should be a lot easier to convince both consumers and producers to stop using and making single use plastics that litter the earth and waste the limited resource. That is why I included plastic water bottles and 6-pack holders and straws and toothbrushes in this image. It symbolizes ALL the things we both waste oil on and trash our environment with. The earth is the MOST valuable commodity of all, and we have to protect and respect her.

My life history infiltrated my thoughts as I was just drifting off to sleep after a long evening of sewing squares together. Such a INSPIRED idea that I was afraid I wouldn't remember it in the morning. Ha! So I jumped up, went into the studio, and started sketching my idea and writing notes about it, notes that would help me to remember.
The next morning, I had a vague realization of what that idea would entail, and it was too much! Yet I couldn't give it up. It stayed with me, unrelenting. I broke down the steps, drawing, editing and cleaning up my drawings, getting screens made, making the prints of each element, and then sewing all the pieces together. I couldn't decide if I wanted to make the screens myself (of which there are a number of different ways to do that), or simply paint or draw all the elements by hand? Since I wanted repetitions of each one, it made sense to make a screen and just print them.
 |
| tracing the pencil drawing with a Sharpie |
There was more planning. I had to decide the size of each design and how closely spaced vertically and horizontally they would be. I wanted to fill the space completely and not have any of the designs falling off the top or bottom edges. So, I drew the designs, and used photoshop to change the scale, then print and place on the design wall until everything was just right.
The purchase of the screens were both expensive and expensive to have the image "burned" onto. I had a few screens that were gifted to me and very useful! But, I still had to buy a few. To save money I decided to try multiple images on one screen. I thought it made sense because I was planning to cut the pieces apart and sew them together. In reality it was not as simple as my plan. Here are a few of the double image screens:
The double screen did save money, but they took more effort and time to print. I did not have enough seam allowance to print them like this. So, I covered one side with plastic folder (cut to size) and then printed the other side. I used black fabric paint which dries very quickly in the screen, so all my materials were carefully planned and arranged to facilitate fast printing. It is stressful and yet fun to watch the images produced so quickly.
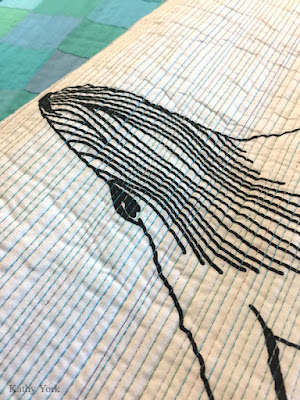
I thought I took more pictures of the printing process, but I was so busy trying to crank it out, there was no time for photos. As I was practicing with the whales, for the back another small quilt (
here), I was printing outside and hanging the fabric to dry in the sun. That was not the best idea. Working in the Texas heat made the paint dry faster in the screen. I had no idea how much I would need so I bought a lot extra, because I didn't want to run out during a print run.
The ship was the hardest to print. The screen would kind of roll while printing and mess up the design after the first run. I think it took 7 prints to get 3 reasonably good ones. It was a learning process to be sure!
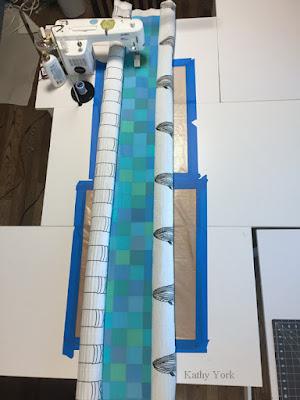
After all the prints were made and dried, I heat set them with my iron, and then trimmed them with the rotary cutter and sewed all the pieces together. It was now ready to layer with the front, baste, and then quilt. :)